Spin Art Machine
By Mike on Saturday, November 24, 2007, 10:49 - Permalink
 In case you slept right through the 1970s (or weren't born then, perhaps), this is a machine that spins a piece of card, paper or canvas really fast, causing any paint applied to it (before spinning it, or while it is spinning) to splatter off in interesting and striking radial patterns. In this project, we're going to try to make one out of scavenged and upcycled parts.
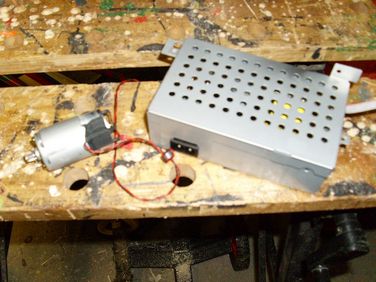 I'm starting off with a smallish, but powerful electric motor that was harvested from a broken Epson inkjet printer. I'll also be using a 42V mains PSU that came out of the printer.
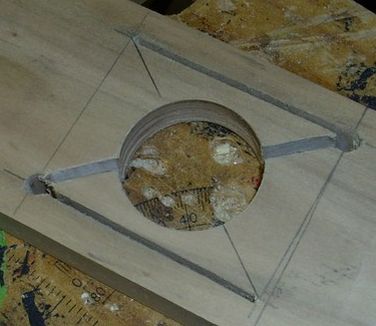 The first task is to build a suitable mount for the motor - I did this by cutting a hole through a piece of hardwood (maple, possbily) I reclaimed from an old pallet - unfortunately, my smallest holesaw is just a tiny bit bigger than the diameter of my motor, so I cut a couple of slots alongside the hole, then back into it, like this.
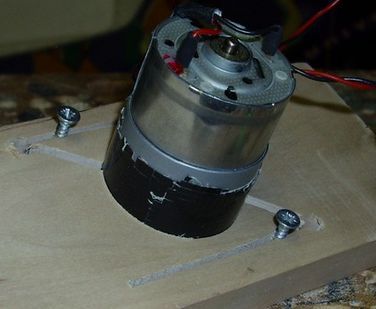 Then I inserted the motor in the hole and drove a screw into each of the slots - forcing the free tongue of wood inwards a little, gripping the motor very tightly.
Well, things progressed quite fast with the build after that and unfortunately, my camera battery was flat, so I couldn't document it completely. I epoxy glued a ply disc to the motor spindle and mounted the whole assembly onto a square of plywood, like this.
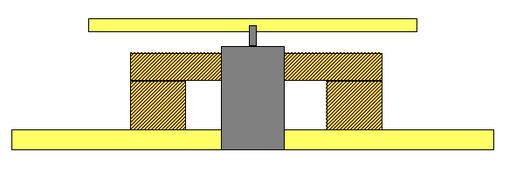
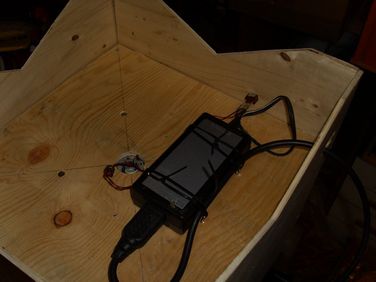 Then I built it into a ply case and fitted the motor board as a false bottom. The space below the false bottom allowed me to fit the PSU and wiring.
It's a different PSU to the one I originally intended to use - that one kept cutting out - I think it probably couldn't handle the initial load of the motor, at least not with the ply disc attached - I expect it draws a bit of current when it's getting up to speed. This one is only 18V, but the motor is designed to run on anything between 12 and 42 Volts, so that's fine.
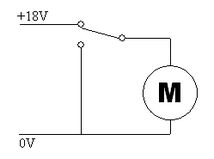 The device is wired according to this diagram.
There's a reason for doing it this way - when it's switched on (as shown above), the motor power circuit is complete and the motor runs. When it's switched the other way, the motor terminals are connected together - not only does this disconnect the motor from the power source, but it also brakes it - the motor continues to spin fast because of the ply disc acting like a flywheel - this generates electricity (the motor becomes a dynamo), but the current generated flows in a direction so as to try to turn the motor in the opposite direction - thus slowing it down.
This effect is described by something called Lenz's Law - and it's the same reason a bicycle dynamo becomes harder work to run when you turn on the light and draw power from it.
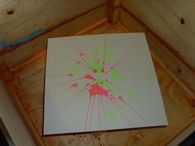
Anyway, Physics lesson over... The inside of the spin art machine looks like this:
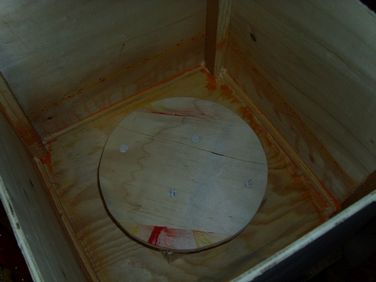 Aha. You noticed the telltale splodges and splatters of paint there, didn't you?
I couldn't resist trying it out - I fixed a piece of card onto the turntable (using white-tak pushed into four depressions I drilled previously on the surface of the disc) and spun it up - It spins really fast - I'm not sure exactly how fast, but it could be something like 1000 RPM.
Paint went everywhere - most of it stayed inside the box, but there was a fine aerosolised mist that wafted out and coated everything.
The paint I used was non-drip emulsion from my stage scenery painting box - a bit thick for this purpose, so I used a number of techniques:
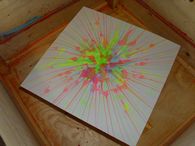
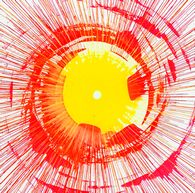
- Initially, dabbing splodges of paint onto the card, then running the machine; this resulted in a bold radial pattern
- Dripping water onto the spinning card helped to spread things around a bit, but also made the most mess, as the water was blitzed almost to vapour by the spinning disc
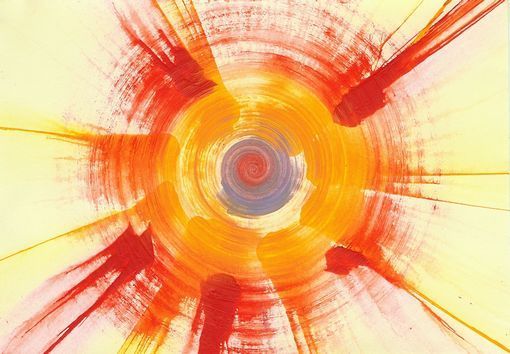
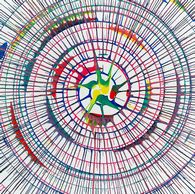
- Dragging a brush across the spinning card resulted in a nice swirly tight spiral
The results? Not bad at all; Judge for yourself:
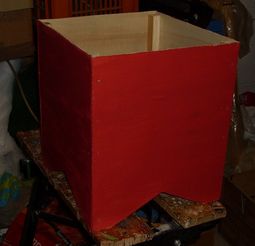 I still need to make the machine presentable though, so I gave the outside a lick of paint.
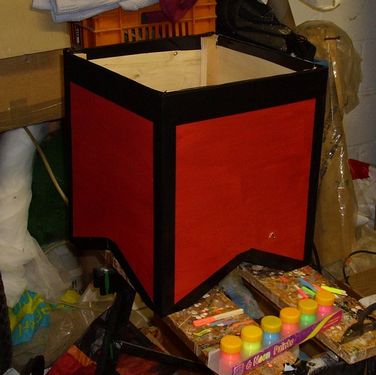 When the paint dried, I went over all the edges with some black duct tape - and here it is - the finished (well, more or less) machine:
I'm probably not going to try to make it any more presentable than this - after a fairly short period of used, I think it's going to acquire a rich patina of paint blobs and mess anyway.
I might add a speed control at some point, as it spins very fast and this tends to favour the radial patterns and suppress the circular ones forming (unless a brush is used when the thing is in motion)
What about a really big one?
Maybe you're thinking right now: "Hey, what about making a really big version of this?" - I know some of you are, because
- It occurred to me when I was making this one
- Every now and again, people contact me to ask if I'll build them one
Sadly, it won't work. In order for the paint to spread at the middle, the rate of rotation has to be high, but this imposes limits on the diameter of the canvas.
A canvas of 1 metre in diameter has a circumference of about 3.14 metres - spin this 1700 RPM and the edge will be travelling at about 89 metres per second - that's about 200mph - Touch the edge of that, and it's goodbye fingers.
If you made a really big one (lets say, 3m in diameter) and spun it up to 1700 RPM, the rim would be travelling at nearly 600mph - that's approaching the speed of sound. Needless to say, this would not be a safe machine to be around - and would certainly destroy itself quite dramatically and dangerously before it got anywhere near the speed necessary to be useful as a spin art machine.
Some things don't scale up well - this is one of them.
Project costs
This project cost a grand total of... wait for it... nothing:
- The timber is all from reclaimed pallets.
- The plywood is also from pallet tops.
- The motor came from a broken printer.
- The PSU (the one I ended up using) came from a different broken printer.
- The screws were given to me by a neighbour who was clearing out his van.
- The paint is just a leftover bit in a tin from the garage.
Duct Tape. Ah, well, there's a cost. £1 for a small roll of black duct tape. So it's not actually a zero budget project after all. Curses! Foiled again!
In Action...



Update November 2008 - Edible Spin Art
I'm not really sure what I was thinking when this idea popped into my head - it's a fusion of food and fun - edible spin art.
The Spin Art Machine
There was some work to do before I could use the machine for edible materials - I vacuumed it out thoroughly, then lined it with paper and covered the turntable with a sheet of glossy card.
The purpose of the lining is not to protect the food from the machine - all that mess is just dried paint - it's not going anywhere. The purpose is to protect the machine from the food - it's easier to use a disposable liner than to clean up whatever sticky, perishable mess might be created by this venture.
So... what material is to be my canvas?
Toast, of course.
Fixing it down to the turntable was a bit of a challenge - with ordinary card for painting, it's held in place with Blu-Tack - that's not possible with toast, so I pinned it down with a dressmaking pin in each corner, gently tapped into the plywood turntable with the back of a spoon.
Paint?
Butter (melted briefly in the microwave), Bramble jelly, yeast extract (this one is the store's own-brand version of Marmite).
Also (not pictured) chocolate spread and honey.
Spin It Up
Toast simply isn't as durable as art board and my spin art machine has no motor speed control, so I had to limit the speed by switching on and off periodically.
I poured, spooned or dripped the edible painting materials onto the toast variously as it was stopped, spinning or slowing down.
Jam, butter and other toast toppings don't have the pigmentation or adhesion properties of poster paints - lots of the material simply splashed right off the toast - or left only faint marks where it did adhere.
Results
Not bad, for a first effort.
The idea needs further development, however; the crumbly surface of the toast is not conducive to adhesion of edible paint arriving at high speeds, also the painting materials left much to be desired - they were not sufficiently bold in colour and were difficult to apply properly - being blobby, stringy or too thick.
