Using A Braiding Board - Pattern 6 - Clasp Loop
By Mike on Sunday, May 24, 2009, 23:00 - Permalink
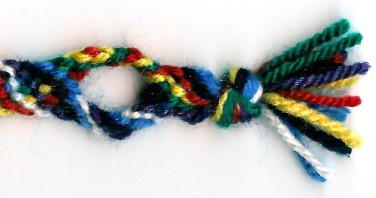
 If you’re making friendship bracelets, you’ll need some way of fastening them - the simplest way to do this is to weave an open loop into your braid, so that the knot at the other end can be pushed through to secure it.
Setting Up
What? Where? How?
If you've landed straight on this page, all this talk of move groups and sequences might not make the slightest sense. If this is so, please do take a look at the introduction page for this topic - where everything is explained in full and hopefully clear detail.
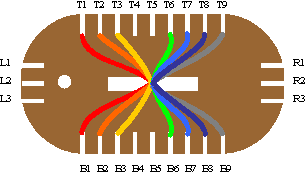
Move the seven pairs of threads from their existing positions - arrange them in mirrored pairs on the board like this:
 T1 + B1
T2 + B2
T3 + B3
T6 + B6
T7 + B7
T8 + B8
T9 + B9
Move Groups You Will Need For This braid
Don't do anything just yet - this is just a description of the move groups you'll need - the order in which to perform them appears further down.
Move Group L
Work the right group
Move:
T9 to B5
B9 to T5
T8 to B9
B8 to T9
T7 to B8
B7 to T8
T6 to B7
B6 to T7
T5 to B6
B5 to T6
Move Group N
Work the left group
Move:
T1 to B4
B1 to T4
T2 to B1
B2 to T1
T3 to B2
B3 to T2
T4 to B3
B4 to T3
Creating The Braid
OK, ready... You've already set up the threads as detailed at the top of the page (right?)
Now perform the move groups in this sequence:
Move Group N
Move Group L
The number of repeats necessary will depend on the size of the loop required - which will in turn be dictated by the size of the knot which has to pass through it.
After you’ve made the separate sides of the loop, join them back together by working a few rows of diagonal braid or some other pattern, or just finish off using the instructions here.
