Making A Replica Roman Dodecahedron
By Mike on Sunday, March 3, 2013, 23:40 - Permalink
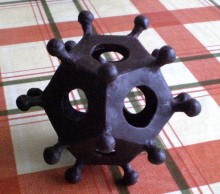 All across Northern Europe, curious dodecahedral objects have been found at Roman archaeological sites. The original purpose of these intricate objects is not known.
In this project, I will attempt to make a replica dodecahedron - to see if I can work out what they can and cannot be used for.
Making The Dodecahedron
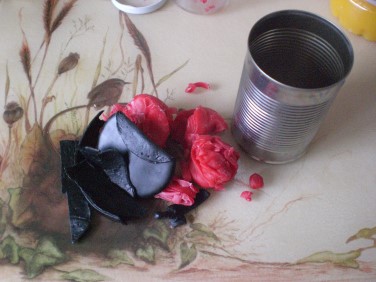 I'll be attempting to make my dodecahedron by lost wax casting (as I have had moderate success with this method in previous projects, such as my Lard Lamp.
The wax I use for this method is the pliable wax used as a covering for some cheeses (in this case, some red wax from Edam and BabyBel and a thick piece of wax from a truckle of excellent vintage cheddar)
When warmed in the hand, this wax is as workable as plasticene, but hardens like candle wax if chilled - perfect for this kind of work.
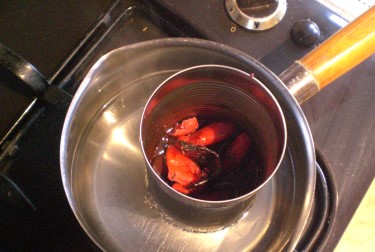 To begin, I need some flat pieces of wax for the faces of the dodecahedron. It would be messy to try to roll this out like pastry, so I will melt and pour them.
I melted the wax in a cleaned soup can, in a pan of water over a low heat - see important safety note below.
Safety
Always use a double-boiler or other temperature-regulated method when melting wax.
Melting wax over direct heat can result in a serious fire or explosion - as it can vaporise and suddenly ignite.
Dozens of these objects have been found at archaeological sites throughout Northern Europe - usually only one per site - and sometimes broken or incomplete, but it's a delicious mystery that we have these beautiful and intricate devices spread across a wide region, and yet, nobody knows for sure what they do.
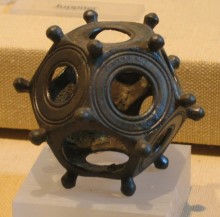 Here's a picture of a typical Roman Dodecahedron from Germany:
Theories
Theories abound, of course - including 'artifact of religious purpose' (which seems to me to be synonymous with "we haven't a clue" in the vocabulary of archaeologists) - but also: pipe measuring device, surveying tool, tent pole joint, headpiece for a standard or staff, gaming device, weapon, etc.
And of course, I have a few theories of my own - some of which have (in my mind) increased in credibility over the course of my attempt to make a replica - others have become less likely
What It Probably Isn't
Many people, on first seeing a picture of these objects, leap to the conclusion that it's intended for throwing or rolling - like a gaming die (indeed, twelve-sided dice are not uncommon nowadays) - however, I don't believe it can be that - as it's big (the size of an orange), heavy (usually made from bronze) and a little fragile - cast metal is typically brittle - if this thing was for throwing, the corner balls could be expected to break off on first or second use, which hardly seems probable, given the effort required in making it.
Taper Gauge is another popular notion, however (and this only really hit home for me when I started making one) the pairs of opposing holes are nearly the same size - in fact, they're similar enough in size that it perhaps could be argued that they were intended to be the same, but turned out a little different just because of engineering tolerances etc.
Retort - for a little while, I really thought I'd got it - I'd seen small Roman ointment or medicine bottles in museums that were cone shaped or elongated ovoid, with pointed bases - and I imagined them resting in one of these dodecahedra - perhaps after it had first been heated to make an oile or wax-based ointment more liquid - the physician placing the awkward pointed bottle back in the retort whilst working on his patient.
However, the nearly-matching opposed hole sizes seem to make this less likely - unless the Romans also had test tubes...
Universal Eggcup - We all know the Romans were fond of a wide variety of foods, so I was momentarily tempted to imagine this being a device for securely holding boiled eggs of any size from Quail to Swan. But I don't know if the Romans even ate boiled eggs in that way - besides, it doesn't explain why there's seemingly only ever one of these found in any particular place.
Apprentice's Materpiece
It may be that these objects exist for the sole purpose of being difficult to make - there are many different challenges to overcome when making one (keeping the wax workable, getting everything the right size, accidental breakage of the delicate wax form whilst constructing it (in fact, I discovered myself that as more of the corner balls are added, it gets progressively harder to work on the form without damaging it).
Furthermore, different variants of dodecahedra exist, with quite a wide variety of different forms and measurements - it's really hard to imagine a single practical purpose for which they would all be suited, other than as a showpiece.
Imagine a metalworker needing to prove his capability in casting, finishing, soldering, etc - what better than a small, hand-portable demonstration piece?
Additionally, the decoration of these items varies - some are plain - others have rings embossed concentrically around the holes, others have small rings arranged in the corner spaces around the holes - it's again not hard to imagine that a written specification saying something like 'each hole is to be surrounded by rings' being interpreted as meaning concentric rings, or a collection of small rings encircling each hole.
Of course, it's all speculation, as nothing seems to have been written about these dodecahedra, but maybe that's not true - maybe it's hiding in plain sight - it could be that stumbling upon the purpose of these objects could be the key to unlocking the meaning of some previously-obscure writing somewhere - not like a secret code as in the movies - just something that doesn't jump out as meaningful, until you know exactly what it's talking about.
Techniques
I'm making my dodecahedron by lost wax casting - and we know this method was used in antiquity - furthermore, the Romans used cast wax tablets for writing, so it may be that my own approach isn't very far from the original.
Other (usually simpler) examples have been found carved from stone, or made from flat metal plates soldered together.
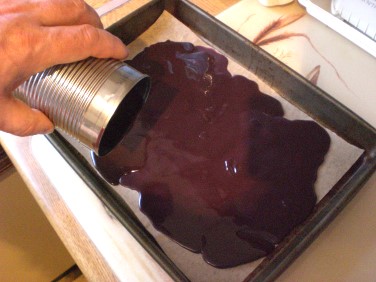
Once the wax was fully melted, I poured it out onto a sheet of baking parchment on a metal tray.
I previously ironed the parchment to make it really flat. The metal tray conducts heat away from the wax, setting it quite quickly.
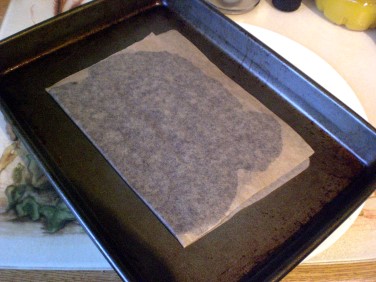 The resulting layer of wax was just a little bit thin and bumpy, so while it was still pliable and slightly sticky, I folded it in half onto itself.
I gave this a gentle roll with a pastry rolling pin, then set the tray in the fridge to harden.
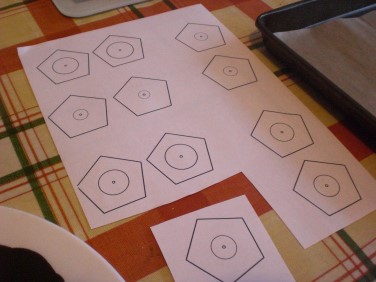 Meanwhile, I created templates for the faces of the dodecahedron - this was a little tricky, as much of the research on these artifacts has been carried out in Germany, Belgium and The Netherlands - and is not written in English.
However, with the kind assistance of museum researchers, curators and staff who corresponded with me via email, plus discussion of this topic on message boards, I was able to formulate a design, which I laid out using InkScape (a free Open Source vector graphics program).
The pentagonal faces are a little under 50mm in height - and the circular cutouts (opposite faces paired) are:
- 10.6mm and 13.0 mm
- 13.8mm and 14.0 mm
- 25.2mm and 27.0 mm
- 20.3mm and 20.5mm
- 15.6mm and 17.8 mm
- 23.0mm and 26.0mm
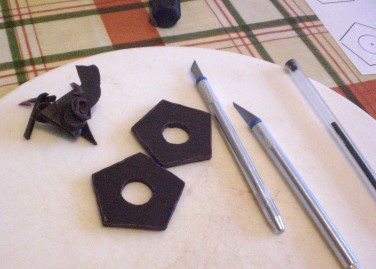 The wax sheet I made was just sticky enough that the cut out paper templates stuck to it on their own - and I cut the pieces out with a sharp craft knife.
Cutting out the circles was a little more tricky - I marked them onto the wax by drawing over the paper with a ballpoint pen, then peeling off the paper.
It was easiest to stab a thin blade right through the wax and into a cutting board, then rotate the pentagon to make the circular cut - trying to move the knife in a tight circle would have been difficult or dangerous, I suspect.
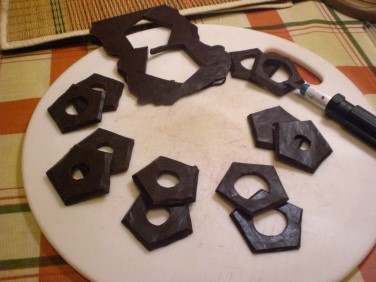 I ran out of wax after cutting half of the faces, so I just re-melted all the offcuts and made another sheet.
I cut a small chamfer on the inside edges of each face - as they need to meet at an angle.
Assembling The Dodecahedron
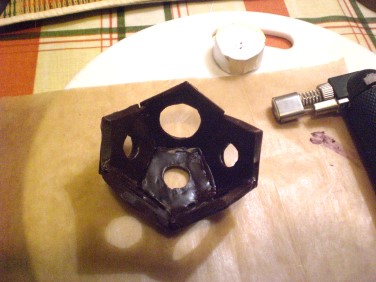 This was really tricky - ideally, the wax needs to be softened in order to join the edges, but it's difficult to do this without melting and deforming the intricate pieces.
I experimented a little with a method analogous to soldering - that is, placing a small fillet of additional wax along the inside of each seam, then melting it into place with my kitchen blowtorch.
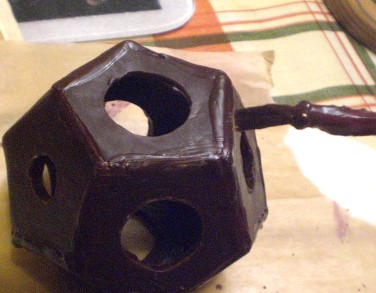 Eventually, I worked out a better method - I kept a can of wax in a molten state in a pan of hot water and brushed this into place with a small paintbrush.
This was also useful for filling in imperfections where the initial cutting had gone a little off course. Once the brushed-on wax had set, I just scraped it back to shape with a sharp knife edge.
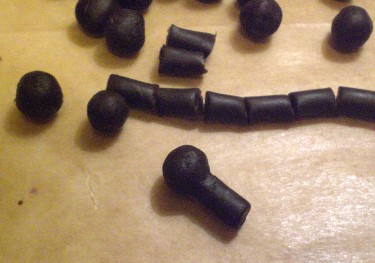 Each vertex of the dodecahedron needs a little ball-shaped protrusion on a stalk (although nobody knows why...)
These were easy to mould by hand using the offcuts of wax.
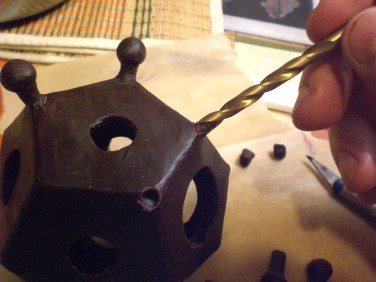 Using a hand held drill bit, I cut a small dimple in each vertex (I don't know how the Romans might have done this - maybe just a warmed metal rod).
I softened the end of each stalk, then pressed it into place in the dimple - smoothing over the joint with the tip of a heated knife.
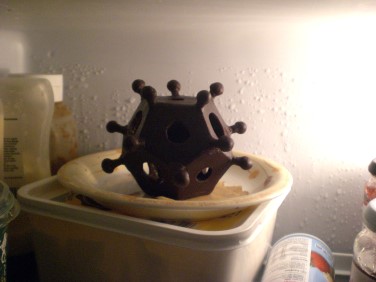 Holding the wax in hand for any amount of time tends to soften it and this can result in damage, so after about 15 minutes of working, I placed the whole thing in the fridge to harden.
Obviously using an electric fridge is not historically authentic, however, it's snowing as I write this, so it would have been possible to do something similar without the fridge.
The Completed Wax Form
A little more filling, smoothing and scraping, and the basic shape of the dodecahedron was complete.
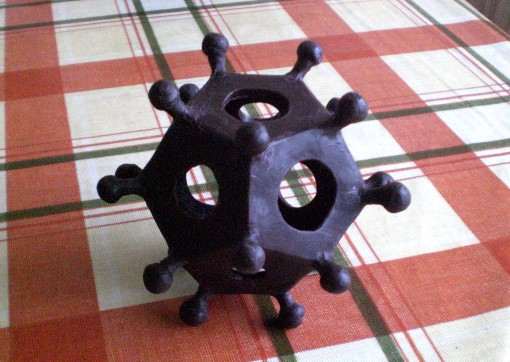
I think I may have made the stalks of the corner protrusions longer than in some examples, however, there is quite a bit of variability in this, so I don't intend to worry about that.
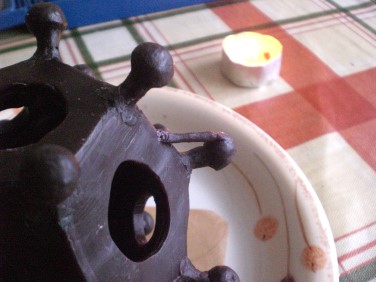 Next, I added the additional bit of wax that will form pouring channels etc.
I noticed that five of the corner balls point upwards - which means they will be unlikely to fill up completely on their own - so I added some little wax rods - which will allow the metal to displace any air out of the top of these parts.
This will also create a small metal protrusion in the cast item, so that will need to be cut and filed away later.
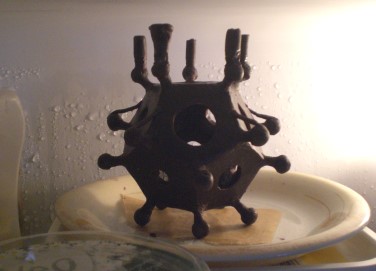 Finally, I added the pouring channels to the top five corner balls - for a cast item of this size, it's important to have several channels, so air can vent out of some while metal is being poured in.
Ideally, I'll pour metal down one channel and keep pouring until I see it well up out of the others - and I'll know that the mould has been filled.
Then the whole thing went back in the fridge to harden, ready for placing in a container to create the mould.
Looks Like Chocolate!
The mixture of red and black waxes made something that looks a lot like chocolate (especially under artificial illumination). I did need to keep reminding my family that the thing in the fridge is just made of wax.
Casting The Mould
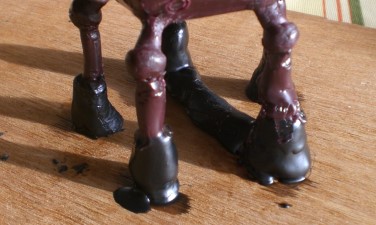 I decided that the sprue channels needed extending, as they need to keep feeding the casting with molten metal as it cools and contracts, so I made five wax stumps and stuck them down to a piece of thin ply by melting them.
In case you're wondering why I joined two of them together - the void left by this wax bar will be the pouring channel, so molten metal will run down two channels and rise up/vent through the remaining three.
Then I joined on the legs of the wax model and placed it all back in the fridge again to re-harden.
Plaster
I had trouble finding Plaster of Paris in big enough packs for this project - so to keep it within budget, I'm using decorator's finishing plaster - this sets nice and hard, and unlike Plaster of Paris, it doesn't generate so much heat as it cures - which is important, as I don't want the delicate wax form to distort while the plaster is setting.
Next, I mixed up some plaster to a thick creamy consistency and painted this all over the outside of the wax form - making sure that it coated into all of the surface details closely.
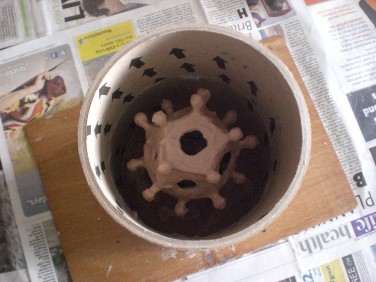 I found two stout cardboard tubes that were just the right size to fit around the form, leaving a couple of centimetres clearance on all sides.
I stuck these together and down to the board with clear silicone sealant.
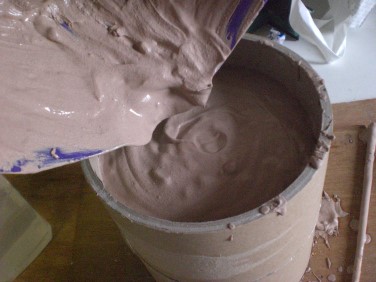 Next, I mixed up a large batch of plaster to a consistency just wet enough to be pourable.
I filled the mould from one side first, until the bottom of the form was covered (this should have prevented an air bubble forming underneath), then I poured the rest of the plaster through the top hole of the dodecahedron, gently forcing the plaster to fill the inside of the form.
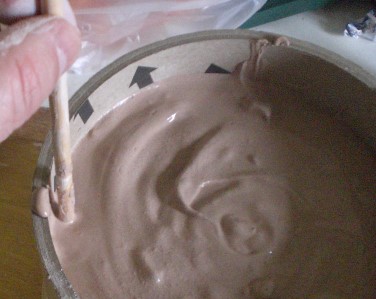 I levelled off the top surface, then jiggled a stick up and down in the plaster at the sides - being careful not to poke the wax form inside.
This caused the plaster to settle and expel some air bubbles.
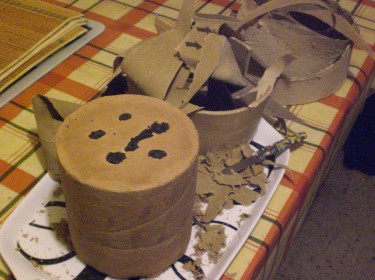 After a couple of hours, the plaster had set rock hard and I was able to peel away the cardboard (in fact, the moisture made this easy).
The plaster seems to have poured well - hopefully there will not be any voids inside the business part of the mould.
This is a hefty chunk of plaster - although it's set solid, I reckon it might take a couple of weeks or more to dry out properly.
Update: I checked and common wisdom seems to be that plaster dries at a rate of about 1mm (of thickness) per day - If that's true, it could take several months for this block to be ready. At the moment (27 Jan 2013) it weighs in at 4.75kg - I'm going to monitor it weekly until the end of February, then take a view on whether it's ready for the next stage.
Update - 3 Feb 2013 - The weight of the block has now dropped to 4.4kg, which is good, but I'll keep waiting. Once I have a few more data points, I'll plot them and look for the graph to flatten out, at which point it should be time to move on and perform the casting.
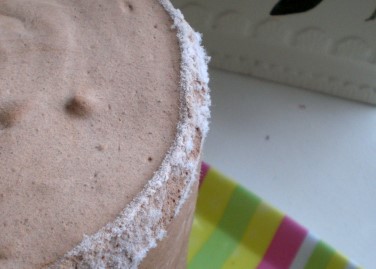 Update - 10 Feb 2013 - the weight has dropped to 3.95kg - better than I thought - so it's still drying out fast.
The Plaster block has grown a little fringe of gypsum crystals along the top edge - more evidence that it's not dry enough yet...
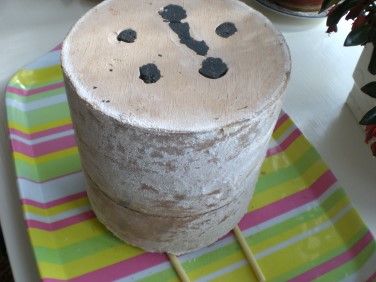 Update - 16 Feb 2013 - The whole thing has grown a downy coat - it looks a bit like white mould, but it's actually just more gypsum crystals.
As the water wicks away from the centre of the block, it's bringing dissolved salts to the surface.
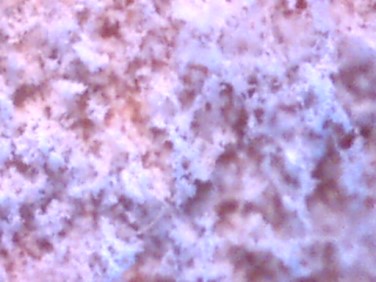 I took a look at the crystals under 200x magnification - hoping it would be impressive and geometric, but the crystals just look like lace.
The block has become conspicuously lighter in colour now and also feels drier and harder - weigh in tomorrow will reveal how much more water has been shed...
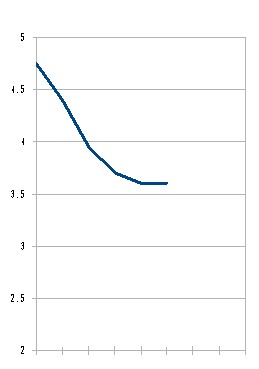 Weigh-in on 17 Feb: 3.70kg - still losing moisture tolerably fast - I've started plotting this progress in a chart - I reckon it should level out somewhere around or just below 3kg.
24 Feb: 3.60kg - Rate of drying is slowing down (as expected).
03 Mar: 3.60kg - Looks like that's as dry as it's going to get - time for casting!
Melt Out The Wax
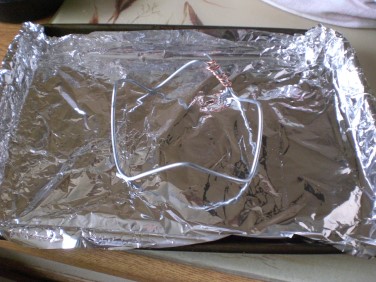 The plaster block needs to go in the oven to melt out the wax - in the past, I've made an awful mess with this, so this time I took a bit of care.
I made a simple wire trivet and stood this on a metal tray lined with foil. I took another piece of foil and formed it around my fist into a rough cup shape, nestled this inside the trivet, then stood the plaster block on top.
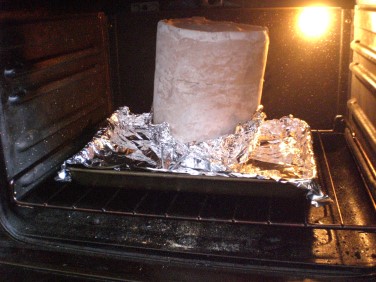 I placed the whole thing in the oven at 150C for an hour and a half.
I checked each half hour and turned the block so that the slight tilt of the trivet gave an opportunity for the wax to run out.
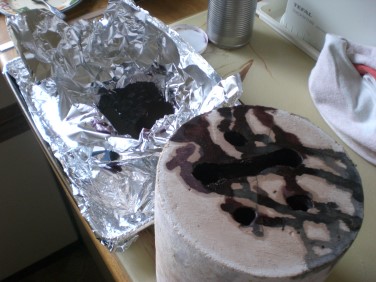 The melted wax collected in the cupped foil - and I poured this back into my modelling wax tin - for use on some future project.
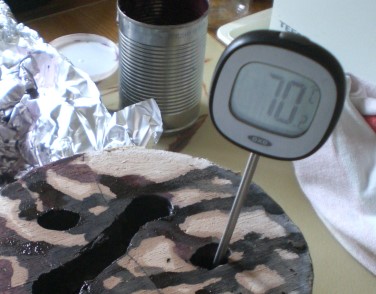 I used a digital temperature probe to check that the middle of the mould was heating right up.
(Incomplete melting out of the wax would be disastrous as the metal would not be able to properly fill the mould.
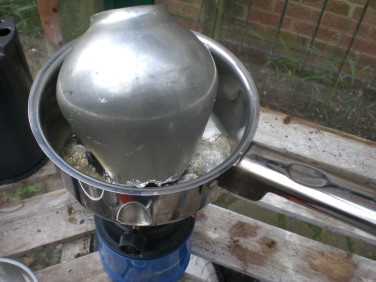 As the last bit of wax was melting out of the plaster block, I started heating up the casting metal.
A dented pewter vase and two cheap tankards went into the pot (this time I'm using a saucepan I bought at a charity shop).
The aim was to have the metal ready to pour as soon as the plaster block comes out of the oven and cast while it's still hot.
Pour In The Metal
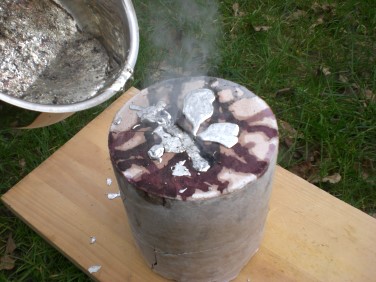 A lot of steam came out when I poured in the metal - some of this will be residual moisture in the block - some will be the water that gets locked up in the chemical process of crystallisation of the plaster.
Eventually though, it settled down and the molten metal rose up out of the vent holes - the mould was full.
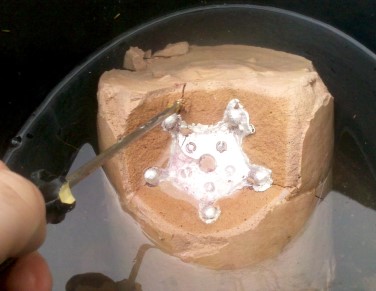 I left it to cool for 10 minutes, then dunked it in a bucket of water.
I think I stopped baking the plaster at exactly the right moment - as large cracks were evident in the outside of the block - another half hour and I think it would have fallen apart.
I picked away part of the mould with an old screwdriver - the first glimpse of the casting looks quite hopeful....
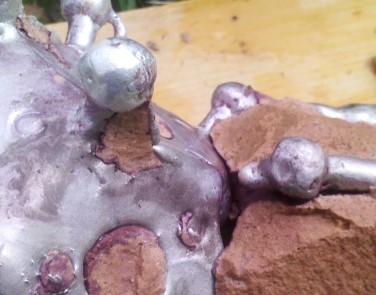 I broke away some other parts of the plaster and found a few imperfections - a void in one of the ball stalks left it unattached to the main body (in fact there were two like this).
This can be repaired later though - indeed I understand some archaeological examples of Roman Dodecahedra show evidence that some of the balls have been resoldered in place.
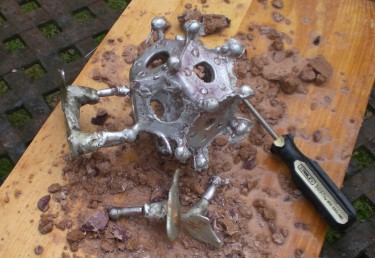 All in all though, it's not a bad result. Picking the plaster core out of the middle of the casting was horribly laborious, but got easier as it progressed.
My dodecahedron won't be perfect when it's finished, but it's just about good enough that I don't need to start over from scratch.
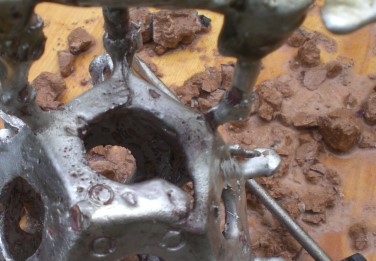 There are a couple of corners where balls need reattaching - but this should be fairly easy.
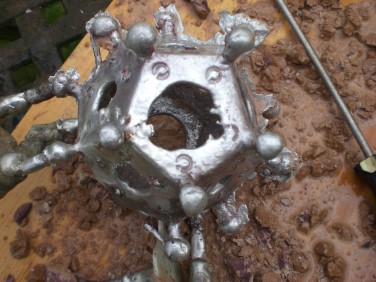 There are also a few other imperfections in parts of the casting - I'm hoping that I can build these up with solder, then file back to the right shape.
Once that's all done, I'll copper plate the object, which will hide the solder joints.
Mould Fragments
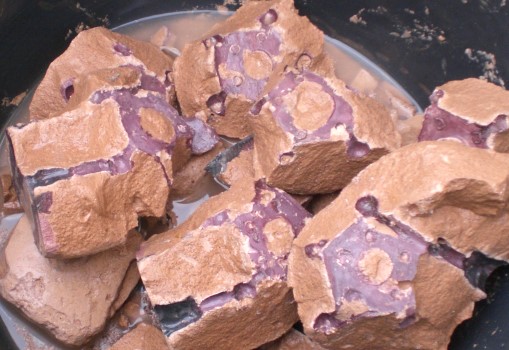
One last thing about the plaster mould - it came apart into chunks that clearly show the form of the object - and there is something tantalisingly familiar about these - I'm thinking that if historical examples of these dodecahedra were made in clay moulds, and the clay was fired to melt out the wax, there may well be surviving and recognisable mould fragments - maybe re-used in the foundations of a wall or some such.
And I can't escape the notion that I've seen such a thing, somewhere. So if there are any archaeologists watching - please take a look at the image below - ever seen anything like this?
Not Good
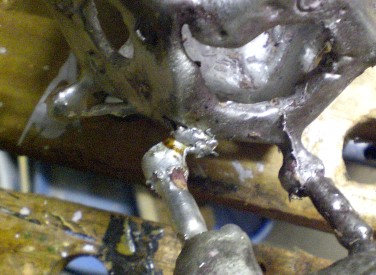 Solder repairing the casting turned out to be a big problem - it's a huge heat sink, which means the solder hardens immediately on touching it, before it makes a proper bond.
Heating the area to be soldered isn't really possible either - as it just melts and sags out of shape. I tried with two different kinds of soldering iron, two different sizes of blowtorch and with plumbing solder as well as strips of pewter cut from a tankard I didn't use in the melt - nothing works.
Unfortunately, I think that means I have to start over completely with a new wax model, etc. Obviously, I'm not delighted about that, but I'm not ready to give up yet.
