The Two-Hour Trebuchet
By Mike on Wednesday, September 3, 2008, 14:04 - Permalink
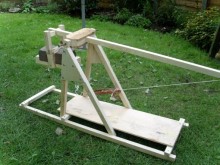 The purpose of this project was to design and create a working model trebuchet - capable of launching tennis balls - and manufactured from scrap materials in as short a time as possible.
With that in mind, it's not going to be a beautiful, efficient or durable machine, but hopefully it will still work...
Materials:
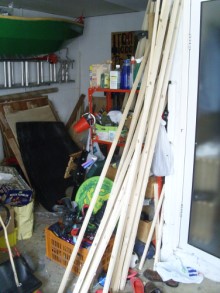 Most of the construction will be done using a stack of inch-square batten that's been cluttering up my garage for too long.
I'm not sure what this stuff was originally used for - some of it contains big wire staples with remnants of card under them.
The Build
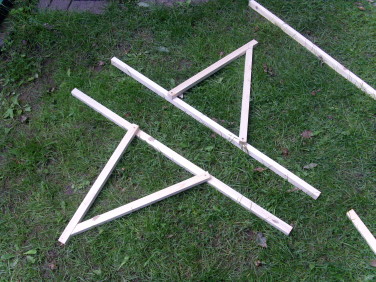 No time for drawn plans - I just jumped straight in and started cutting timber and screwing it together - starting with a matching pair of A-Frames, built on a one-metre base.
The uprights for the A Frame are 50cm long - and they're positioned pretty much by guesswork - care of course being taken to ensure that they are as near identical as possible.
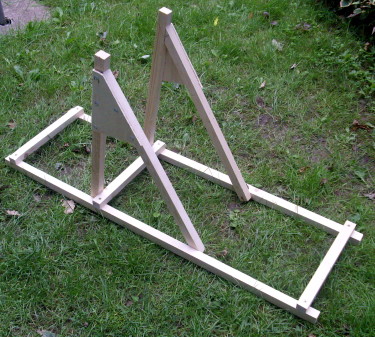 These I fixed together, about 30cm apart.
I also reinforced the apex of each A-frame with triangles of plywood.
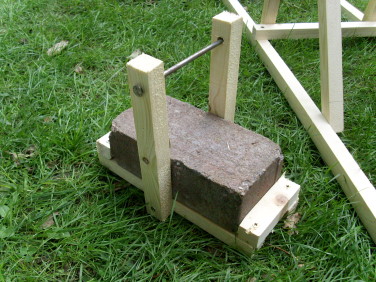 The counterweight consists of a heavy engineering brick, cradled in a timber skid.
The hinges and pivots will be made from six inch nails.
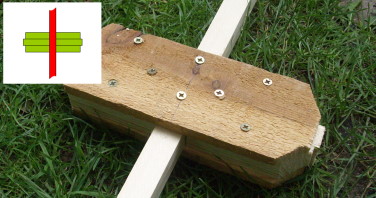 The swing beam is one metre long - about one fifth of the way along its length, I built a reinforced pivot support by sandwiching three short pieces of batten onto each side (see inset diagram).
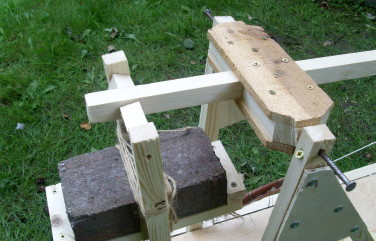 A few more holes to accommodate the nails used for the main bearing and the device was assembled.
I lashed the counterweight onto its cradle and added a couple of drilled timber spacers on the supporting bar - to keep it aligned in the centre of the device.
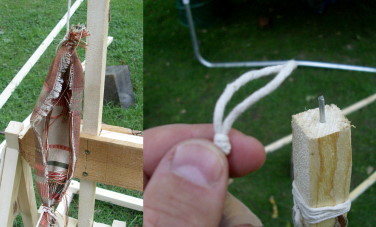 The sling is made from a rectangle of fabric and some cotton string.
One end of the string is permanently tied near the end of the swing arm. The other is formed into a loop slipped loosely over a headless nail driven into the end of the arm.
In theory, the loop should slip off and release the payload somewhere along the sop of the arc of travel...
The Finished Article
Last bit - a ply floor on which to place the payload and it's all done.
As I said, not beautiful - and probably not efficient or durable either, but here it is - a tennis ball trebuchet in under two hours...
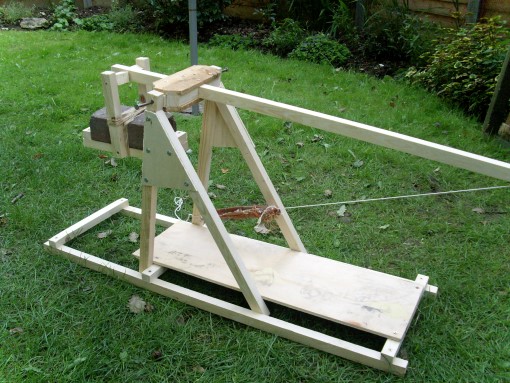
NB: This is not the firing configuration - I just tied the release end of the string onto one of the timbers to show it with the beam in the horizontal position.
But Does It Work?
The proof of the pudding - in video format:
Trebuchet Theory
Trebuchets make use of mechanical advantage - that is; as a heavy weight descends on the short arm of a pivoting beam, the longer, lighter end of the beam swings upwards - and much faster than the weight, owing to its extended length.
But that's not all - a payload merely launched by the end of the ascending beam would not travel very far at all, but the movement is amplified by a slingshot mechanism attached to the very end - like the cracking of a whip, this magnifies the action so that the payload is swung in a large, fast arc and (ideally) released somewhere along the part of its travel where it is moving upwards and forwards very fast.
Consistency
But speed and power would be nothing without consistency of action - which should in practice translate into accuracy of fire. If the machine operates in the same way each time, the payload should be delivered to the same location.
Note
Before, during or after the video(s) embedded in this page, the player may display advertisements or links to additional videos - these are not affiliated to Atomic Shrimp and the selection is something over which I have no control.
