Drink Can Tinwork
By Mike on Friday, October 17, 2008, 22:23 - Permalink
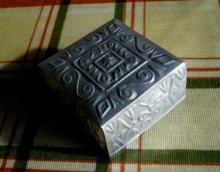 Soft drink cans are easily recyclable as scrap metal, but I fancied trying something a little more direct - a simplified form of tinwork.
Materials
All that's needed for this project is a strong pair of scissors, a cork-backed table mat, a pointed object (a scriber or just a ballpoint pen), a little bit of tape and some fine abrasive paper.
Plus of course an empty aluminium drink can - this one contained 'Emerge' - an energy drink containing caffeine and taurine, with a flavour and aroma that perfectly reproduces the experience of drinking something fizzy and anonymously fruity next to a public urinal. If that puts you off the idea of emptying a can for yourself, there are probably other places you can get hold of one.
First, I cut the can down one side, then cut carefully around the ends.
Extreme care is required here, as the edges of the thin metal are sharp and jagged.
Then I opened out the side into a flattish sheet and gave it another trim to remove the worst of the jagged points.
It's always a bit surprising how much material such an apparently small cylinder yields - I think it's just not all that easy to intuitively estimate the circumference of a circle.
I taped the metal down flat onto the cork back of a table mat, then used a piece of fine abrasive paper to remove the printing.
It isn't strictly necessary to remove the paint from the can, but it does make forming a pattern easier later on.
Then I used the scriber (and later, an ordinary ballpoint pen) to mark out a decorative pattern on the metal.
- Pressing just hard enough to crease the material, but not hard enough to puncture or score it
Once the design has been pressed into the metal, it tends to prevent it recoiling back into a cylinder - the work can be removed from the cork board.
I've decorated this one with a simple pattern consisting of geometric shapes, swirls and spirals - but obviously other designs are possible.
It may even be possible, with a little care and skill, to reproduce a picture in beaten relief style.
I cut the piece to shape with the scissors...
Then folded in the corners, to create a box shape.
Again, great care is needed here to avoid cuts from the sharp edges.
Finished
The end result is a little metal box with an embossed pattern.
Not bad for a first effort - I'd do a few things differently next time, such as leaving an extra bit on the edge and folding it over inwards, so the box doesn't have any exposed sharp edges.
It Gets Better
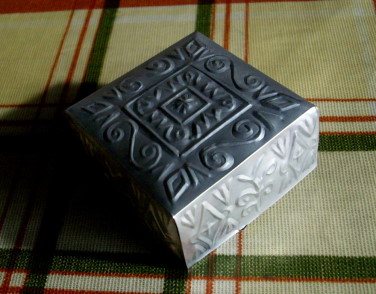 I found a way of getting the design to stand out in sharper relief.
I traced the entire design as normal, then (before any folding) flipped over the metal and using the same kind of embossing technique, traced around the raised pattern elements from the other side - following the inside and outside edges of all the raised elements.
Then I flipped it over and re-traced the original design once more. The result is a much clearer, bolder embossed design.
And Better...
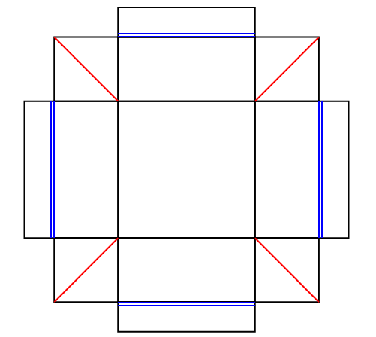 It was also pretty simple to make the box with turned-over edges that were not so sharp - by leaving an extra tab on each side
The diagonal scored lines (marked in red) are embossed from the front surface of the work - enabling the corners to be folded inwards.
The lines scored to enable the edge flaps to be finally tucked in are marked in blue on this diagram - they're embossed from the back, like most of the other work, but I found it necessary to make them from a pair of closely-spaced parallel lines - as the thin metal tends to snap if creased into a really tight fold.
And Better Still
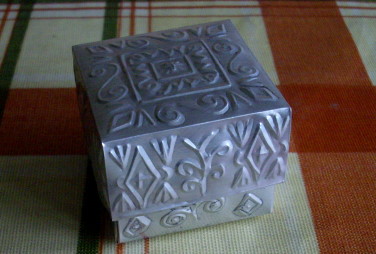 Finally, it's quite easy to tweak the measurements for a second box so that one fits snugly over the other.
I found that by reducing the central square region by about a quarter inch and increasing the height of the sides by a similar amount, the resulting box was just small enough to push inside the other as a base.
Remember which way up it's going to be when you're applying the designs though.
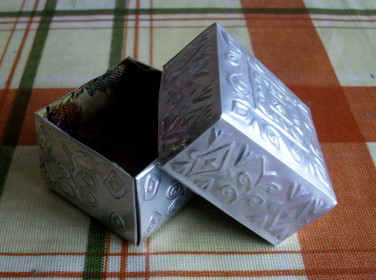 I lined my box with a little scrap of tapestry-style fabric, held in place with all-purpose glue.
Felt or velvet would also work just as well - I think it's even possible to get self-adhesive versions of these, which would probably be ideal.
