Building A Boat - Page 11 - Adding A Sailing Rig
By Mike on Sunday, January 17, 2010, 23:38 - Permalink
I'm going to try to build a sail rig for the Snow Pea.
Materials
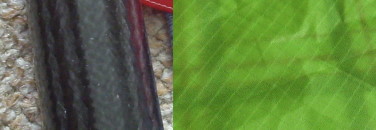 It was the availability of materials that in fact inspired the idea to adapt the Snow Pea for Sail - I picked up a two-part carbon fibre sailboard mast and some fantastic ripstop nylon fabric in a surplus store.
The mast is quite remarkable - unbelievably strong, yet weighs next to nothing, however, it's 4 metres long - too big for my little boat, but it's in two parts and just the top half will be about right.
The fabric is light, unbreakably strong and completely windproof, but too presents a challenge - it's all offcuts, so the sail will have to be assembled out of several pieces.
Making The Sail
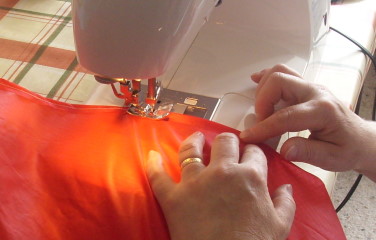 The fabric is slippery and difficult to handle - beyond my capability to sew with any hope of a tidy result.
My wife, Jenny, kindly assisted with joining the offcuts, cutting out and making the sail, complete with proper double stitched seams.
Tasks
As far as I can see, this project breaks down into five construction and/or fitting tasks:
- Sail
- Boom and accessories
- Mast mount
- Keel/leeboard(s)
- Cleats, lines and fittings
Objective
Let's be clear here - the Snow Pea is a small and not particularly sleek craft - my best hopes from this sailing rig pretty much boil down to two criteria:
- Some sort of moderate wind-powered propulsion
- The boat not to overturn
With those in mind, a small sail of no more than, say, 2 square metres should be a good start. I don't hope to go fast with this, nor to use it in storm force conditions.
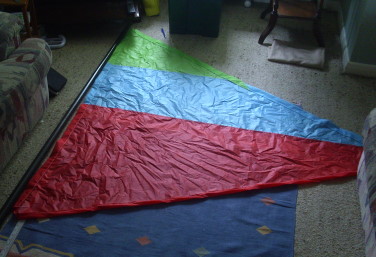 Laid out here against the mast, the sail is about 1.75 metres tall and the same wide - making it a total area of about 1.5 square metres - just right, I think.
This picture was taken when there was still a little work to do - the addition of a pocket into which the boom can be slipped.
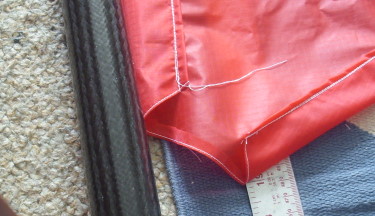 The sail has pocket seams along each edge, through which I will thread a line that will be stretched taut to pull the sail into shape.
I'm not following any established method of construction or rigging here - just making it up as I go.
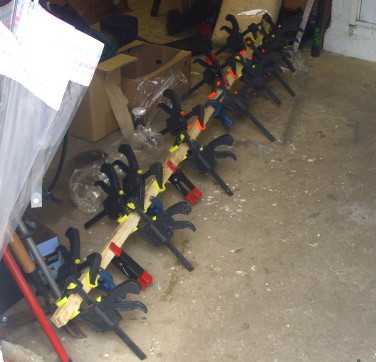 I could have used a piece of solid timber, but I chose to make the boom by the same box composite method I used for making the shaft for the smaller paddle (see page 5)
This will be stronger, lighter and stiffer (yet more tolerant of flexing) than a solid timber section of the same size.
I used nearly every clamp in my collection for this. You really can't have too many clamps.
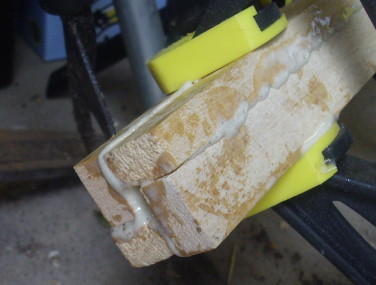 It's made by ripping inch-square battens in half, then gluing them into a square box section using polyurethane adhesive.
The glue foams and expands as it cures, so the central void ends up filled, adding to the integrity of the piece.
When it's fully cured, I'll plane the faces smooth and chamfer or round over the corners.
Keel Options
A sailing boat won't really work without a keel or something like it - the sail is the bit that converts the force of the wind into motive power, but the keel is the bit that stops that power just pushing the boat sideways, when you want to move in a direction other than directly downwind.
Just Use A Paddle
Some canoe sailing kits are designed to work with nothing more than a paddle held against the side, to serve as a lee board, but I think that won't present enough area to the water here - and the boat will still have a tendency to slip sideways
A Fixed Keel
I could just make a keel and fix it directly onto the bottom of the hull - either permanently, or using bolts or some such, but this would make launching or navigating in shallow water difficult or impossible.
A Daggerboard
I could make a keel that is inserted through a slot in the bottom of the boat (like the outrigger has, but doesn't really need) - this could be dropped into place once the boat is in deep enough water.
However, it requires the construction of a watertight slot rising up inside the boat to at least as high as the water level (or it will just be an in-boat fountain, briefly). And in any case, there's just no way I'm cutting a blooming great hole in the bottom of the Pea. No way.
Fixed Lee Boards
Lee boards are quite common in small boats, especially those adapted to sailing after initial construction - they're attached to the side of the vessel and serve the function of a keel, without needing to go through the hull. Usually, there are two of them and the downwind one is lowered (hence the name 'lee' board), so the boat pushes against it.
I could probably get away with just one of them if I could find a way of fixing it so that it is rigid against the side when lowered - this would probably mean fixing something through the side of the boat - and probably into the central rib. Not out of the question, but not something I'll do on a whim either.
A Hooked Lee Board
Alternatively, I could make a lee board that hooks onto the gunwale - the pressure of the boat against it would hold it in place.
The big drawback here is the need to move it from one side to the other when tacking - not a big deal, but it's another job to do when the pressure is on. There would also need to be some system to prevent it being dropped completely over the side and lost, but that could just be a chain or a bit of string.
Decisions, Decisions
At the moment, a hooked lee board is looking favourite (at least, out of the ideas I've considered), as it doesn't require any permanent modifications made to the boat - this is a distinct advantage, in case the whole sailing idea turns out to be unworkable.
Lee Board Plans
I think I'm going to try a fixed single lee board - I was thinking this would have to fix onto just one gunwale, but this could be a problem when the boat is under sail and the board is subject to significant forces - it might damage the side of the hull - it's only 4mm plywood, after all.
The solution is to create a bracket that fixes to both gunwales - having a wooden bar spanning the middle of the boat will hardly be inconvenient at all, and it should be quite straightforward to fix the leeboard to the end of this at a right angle over the edge and down into the water.
Mast Mount
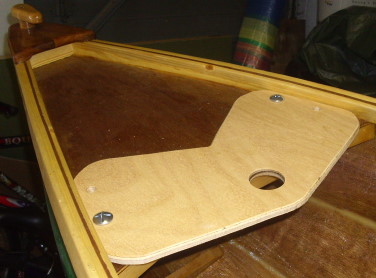 I've cut a sort of butterfly-shaped piece of ply - this will bolt on top of the fore deck and the mast will drop through the large hole in it.
It has holes drilled to match the deck holes for attaching the outrigger pylon - the outrigger only ever uses two of these (which two depends on which side of the boat it's fitted). The mast mount will bolt tight to the deck using the other two holes.
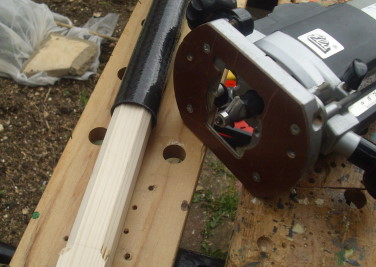 I picked out a nice clear piece of spruce and cut chamfers on all four edges, just deep enough so that it would fit snugly into the bottom of my mast.
The chamfers are stopped, leaving the lower part of the timber square - this provides a lower limit for the mast to stop against and the square timber will be easier to fix to things.
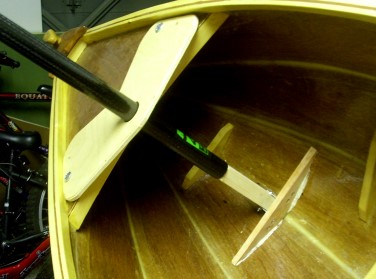 I made a new mini-rib and attached the mast post to it using bolts and metal brackets. I'm not delighted with the look of this, but it would have taken me too long to make a nice-looking wooden fitting.
I attached the rib to the hull with polyurethane glue, which has good gap-filling ability. I might back this up with some battens or beading fixed with epoxy.
The post hinges down under the fore deck when the mast is pulled out.
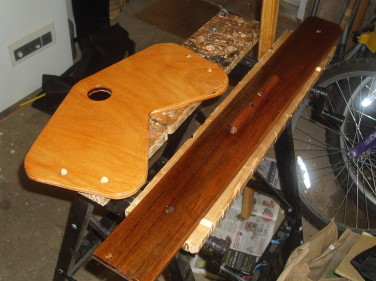 I made a jam cleat out of scrap timber and attached it to the middle of the leeboard cross bar - this cleat will be for securing the line that comes off the swinging end of the boom (I expect it has a name, but I don't know the terminology). I made a similar cleat and attached it to the mast post.
I've given these two parts a coat of yacht varnish.
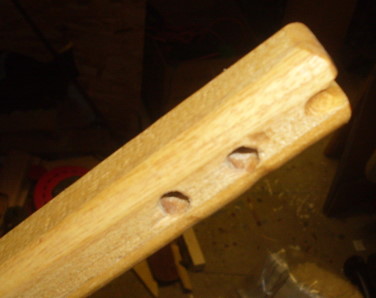 I rounded off the edges of the boom with my router and cut a slot in one end - plus some holes.
The purpose of these will become apparent later
I've finished the boom with linseed oil, as I fear varnish might snag or stick to the sail material.
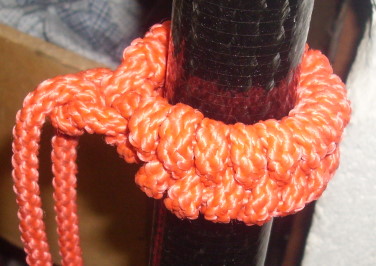 I took some soft rope and made this braided collar.
This will tie onto the end of the boom and secure it to the mast, but still allowing it to swing.
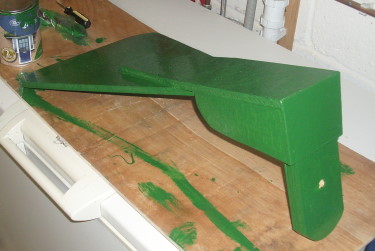 Finally, here is the lee board.
The lee board will bolt onto the cross bar very rigidly and will dip down into the water between the main hull and the outrigger.
There's nothing left to make now - just more varnishing and painting, then assembly and testing.
Some Assembly Required
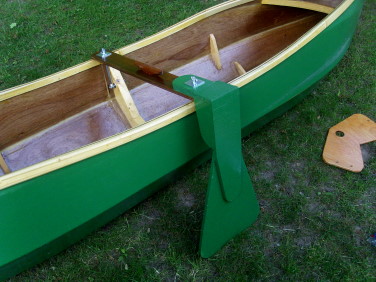 28 May 2010 - everything is finished now, and I have a river trip planned for tomorrow (weather permitting). Time for a dry assembly run.
The lee board fits well and seems very sturdy. It protrudes down below the bottom level of the hull (as well it should) - this means I'll have to take it off for the dry assembly and will probably only be able to fit it once the boat is on the water.
Here It Is
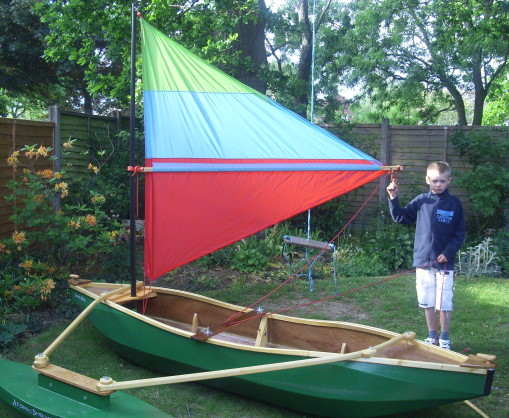 Here's the boat with sail, more or less fully assembled in the garden - it all looks great!
So... tomorrow (29 May 2010), we set sail!
...Or Not
My plan to test the sail was rained off - but the forecast for tomorrow (30 May) is better, so I'm planning to set off from Botley Quay at about 14:30 with one of the kids on board, then stop at Manor Farm pontoon maybe around 15:40, switch children, then proceed on downriver to Hamble-Le-Rice, where there is a public slipway right near the car park. I reckon we'll end up there at maybe 16:30.
This could be an interesting trip, because once the Hamble goes south of the M27 Motorway bridge, it becomes the domain of the Big Boys - there is a sizeable marina. It's not off-limits to small craft, but we'll have to proceed with a bit of caution and respect for the larger boats
30 March 2010 - Sailing Day
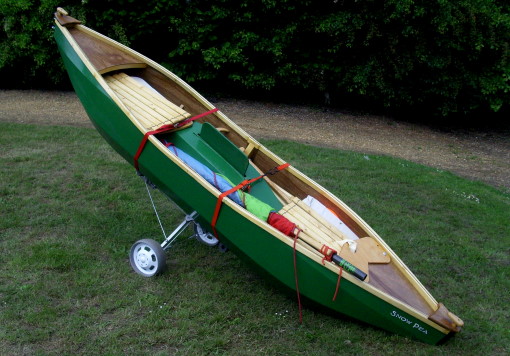 We got down to Botley Quay at just after 14:00 and the tide was already slightly past peak. I arrived first, with the Snow Pea and all its accessories packed inside, on its hand trolley (made from a cut-down folding golf trolley I picked up in a charity shop for a few pounds).
Unpacking and assermbling the boat took about 25 minutes.
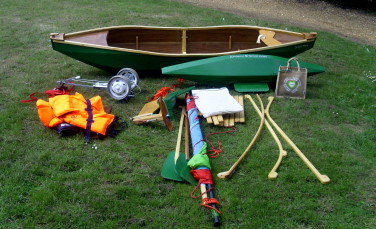 The complete kit of parts to make the Snow Pea is growing somewhat out of control - I'll say more on this later....
The Trip
The trip started off quite promisingly - four boats in our party including the Snow Pea, but paddling was hard work - the Pea is not exactly sleek and so does not cut through the water well - we fell a little way behind.
Just before Fairthorne Manor, where the river joins another fork that goes off to Curbridge, as the river widened and we came out of the shelter of the trees, we started to feel a little wind blowing and deployed the sail. This moment was magnificent, because it worked just perfectly - the light crosswind snapped the sail out at an angle of about 30 to 40 degrees off the axis of the boat and we surged forward through the water - faster than the Snow Pea has ever travelled before.
Then it all went a bit wrong. Just down from Fairthorne, the river turns almost due West and we found ourselves battling a wind that was turbulent and changing, but blowing predominantly in exactly the opposite direction of our intended travel. We tried tacking back and forth across it and made some small headway against it, but we were falling far behind the rest of the party and were getitng tired.
Sailing The Snow Pea
Make no mistake, the sail itself is something of a success. On calm water with a moderate and steady wind, it's lovely being able to sail rapidly downwind and smartly across the wind (although a sudden gust did lift our outrigger clear out of the water once, which was a bit scary), but the Snow Pea under sail isn't really capable of sailing closer than about 70 degrees to the wind, which makes for very slow upwind travel.
Crisis Point
The other members of the party were well out of sight by this point, and we decided to take down the sail and paddle, but the Snow Pea's fairly high wind profile, combined with its slight lack of streamliing in the water made it almost impossible to gain any headway against the now rising wind.
Tired, we decided to try heading back upriver to Botley, reasoning that the wind would help us on our way, but perversely, it dropped when we had gone less than 100 yards. The tide, however, was now steadily on the fall and we could make no progress upriver against it. So we were pretty stuck.
Mayday!
A large motor boat called the Silver Mist was just upriver of us, apparently turning to go back down towards Bursledon - we called out in desperation and managed to beg a tow - initially behind the small motor dinghy that was escorting them, then later behind the Silver Mist.
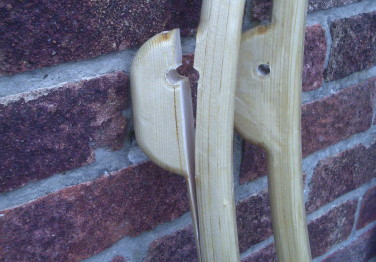 Unfortunately, the speed and turbulence of the wake behind the motor boat was a little too much for the Snow Pea and one of the outrigger pylons broke - splitting along the grain.
It's pretty easy to see why this was the weak spot - although a larger penny washer under the wingnut securing this bolt might have prevented this breakage
It's quite easily repairable though - a bit of polyurethane glue and an overnight clamping and it will be stronger than before it broke.
The crew of the Silver Mist were kind enough to tow us to Manor Farm pontoon, where we rejoined our (worried) family and friends.
The Future For The Snow Pea
All this malarkey was a bit much for me, really. I'm fed up with paddling at full belt only to still fall behind every other boat, and the novelty of assembling the Snow Pea out of an increasingly absurd and numerous collection of parts is starting to wear really thin. I want a proper boat that just works. It's not fun any more.
My mood wasn't helped by the fact that I fell all the way down the stairs on returning home the evening of the trip (no serious injury, except my pride) - so I held back from making a snap decision...
...However, it's time to wave the Pea goodbye and start over, paying very careful heed to some lessons learned. I'll dispose of the Snow Pea as gracefully as I can, in order to clear enough space in my workshop to start a new build - probably a dory canoe.
Lessons Learned
As detailed above, although the sail kit was moderately successful, the boat itself is getting a bit impractical for any kind of reasonable use. I'm going to clear out and start over, but let's bring this project to a proper close by capturing some lessons learned.
Don't Stray From The Plan
I'm not experienced enough in boat design to be able to go it alone - but for some reason, I saw fit to hugely modify an established plan. Bad idea. Stick to the plans, or at least develop a design that makes sense in all important aspects - with stability near the top of the list.
Less Is More
Assembling a boat that at the waterside from a bizarre kit of parts gets old really fast - and more parts equals more points of failure - simpler is better, in lots of ways.
Glue Lamination Is Great
Laminating curved timbers out of thin veneers or laths is lots of fun and the result can be both beautiful and stronger than solid timber of the same section.
Also, the resulting curved components don't mind staying in a curved shape - so a gunwale/rub rail constructed this way won't be trying to spring off or crush the boat.
Epoxy Stitch And Tape Is Easy
Having learned by a few mistakes and clumsy bits on the first build, I should be able to get a much cleaner and more professional finish on my chines next time
The Gloves
Never attempt anything without the gloves. Gluing, painting, filling - all these things are better when you have a ready supply of disposable gloves. Taking off a pair of plastic gloves is several orders of magnitude easier than cleaning your hands. And nothing takes polyurethane glue off at all.
Wheat Flour Filler
Hannu was right - wheat flour really is a perfectly good substitute for wood flour as a thickener and filler for epoxy.
Hammerite As Boat Paint
This one needs investigation before I commit, but I think smooth hammerite might be the choice of paint for the outside of the next boat hull.
Everything Takes Longer Than It Ought To
Varnish and paint takes longer to cure than it says on the tin. Getting a good finish on wood means taking time to sand between coats, glue has to set up. One stage of the build will inevitably hold back the next. This is not a sport for the impatient.
Even Failure Is Interesting
Nothing is learned by *not* trying.
