Lard Lamp
By Mike on Monday, January 3, 2011, 21:51 - Permalink
This is a simple little oil lamp specially designed to burn fuels that are solid at room temperatures - such as leftover fats from cooking bacon, sausages, duck or other greasy foods.
It's made from pewter, using the lost wax casting method.
How The Lard Lamp Was Made
As in the previous Lost Wax Casting projects, I made the form out of the malleable wax from the outside of Edam cheese.
I rolled a small ball of wax, then pierced it with a pencil and rolled it into a hollow cylinder. Then I trimmed off the ends and made four equally spaced lengthwise cuts at each end.
I slid out the pencil, then splayed out the cut segments at each end - shaping them into petals at the top, and simple feet at the bottom.
This wax is quite pliable at normal temperatures and with thin pieces like this, can be too soft to handle. A quick spell in the fridge firms it up, if necessary.
I added a few more details, then curved the petals back inwards - this is the crucial design feature, as these will be warmed by the flame, capturing heat to keep the fuel reservoir in a liquid state.
Once the form was complete, I hardened it in the fridge again, then added some extra pieces on the bottom to serve as pouring channels for the molten metal.
I've used clay for the mould in previous experiments, but decided this time to try Plaster of Paris. That was the plan, anyway, but I couldn't get hold of any, so I decided to try with decorating filler instead.
I melted the ends of the wax plugs that will form the pouring channels, then stuck them to the bottom of a cut-off plastic bottle.
I had to use more water than the directions on the filler pack recommended - in order to make it up to a pourable consistency.
It took all of the 450g pack of filler to completely entomb the wax form. To try to prevent imperfections from air bubbles, I agitated the wet filler by plunging a bamboo skewer up and down in each corner of the container (being careful to stay away from the delicate wax form now hidden in the middle.
The plaster took a long while to dry (probably because of all the extra water I added. After two days, it was solid enough that I could cut away the plastic container, which helped it to dry further by exposing all of the sides to the air.
I set it in a bowl on top of one of my central heating radiators for a couple of days, then, about a week after starting, I set about melting out the wax form.
As before, I did this by placing the mould upside down in the oven, starting at 150C and raising the temperature gradually over the space of an hour, finishing at 220C. Hardly any of the wax dripped out - only a few drips from the ends of the pouring channels.
Peering inside, however, I could see the mould void - as it later turned out, most of the wax had either evaporated away, or soaked into the porous matrix of the mould. Not what I expected.
Casting
I used pewter recycled from a dented old tankard I got from a charity shop again for this casting - take a look at the previous couple of pages for more details on how I prepared the metal for casting.
I melted the pewter and poured it into one of the filler holes - I was pleased to see it rise out of the other three and overflow a little.
There was some bubbling and hissing as steam emerged from the pouring hole, but this quickly died down - and crucially, before the metal had solidified. I tapped the mould sharply a few times to allow any trapped air to come out, but none noticeably emerged.
I left it to cool for an hour, then carefully broke away pieces of the plaster to reveal...
...A near perfect result. Some of the fine detail didn't come through properly, but the metal made it all the way to the tips of the petals, and there were no big holes - except the one I wanted, running through the middle of the piece, to take the wick.
I threaded a piece of cotton rag through the middle of the lamp, then placed it in a glazed bowl.
I melted some lard (leftover from frying sausages) and poured it into the bowl, up to the base of the petals, then placed the whole thing in the fridge for the fat to cool and set solid (so the first test would be a fair one)
Then I took it out and lit the wick.
It works perfectly - exactly as I had imagined - the recurved petals capture some of the heat from the flame, which is then conducted down through the metal and out into the four splayed feet at the bottom.
This melts the fat and enables it to continue being drawn up the wick to feed the flame,
Solid Fat Lamps
We're all of course very familiar with a different kind of lamp that is designed to burn fats and oils that are solid even in a warm room - these lamps are called candles.
However, in a temperate climate, you can't really make candles out of unprocessed lard - it's too soft and sticky, melting completely a little above normal room temperatures - but at the same time, you can't burn these fats in an ordinary lamp, as they will set solid and will not rise up the wick.
I designed this simple lamp to solve these problems - it works by harvesting some of the heat from its own flame and conducting it down into the solid metal prongs at the bottom - maintaining its own fuel reservoir in a liquid state - and therefore able to soak up through the wick as it burns.
Other Fuels
Although this lamp is designed for solid fats, there's no real reason why it couldn't alternatively be used to burn liquid vegetable oils such as sunflower or olive.
Moment Of Truth
One of the most nervous moments in a metal casting project like this one is breaking open the mould - will the metal have reached into all the little nooks and crannies? Will there be imperfections or voids in the casting?
So it's a welcome sight and a real thrill when the first glint of fully-formed, shiny metal appears through the broken edges of the mould material.
Copper Plating
I later decided to try copper plating my Lard Lamp - and the results were quite pleasing - take a look here for more details...
Safety
Even a comparatively low temperature alloy such as pewter still gets plenty hot enough to cause really nasty burns if great care is not exercised. Also, molten wax can scald, and wax vapour can ignite - so be careful.
In use, the Lard Lamp employs an open flame - never leave a candle or other open flame burning unattended.
Experimenting With Other Mould Materials
Pewter has a sufficiently low melting temperature that it can be cast into natural or silicone rubber moulds. But the materials to make these aren't always cheap or easily obtainable... Or are they?
A New Lard Lamp
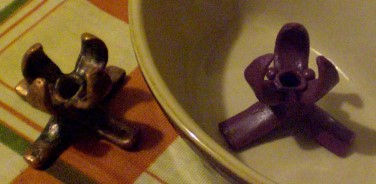 I made a new wax form for the Lard Lamp Mk 2, trying to learn from some of the mistakes of the first one (seen on the left).
The main difference was to provide it with only three feet, preventing the potential for wobbling, but I also made this one a bit finer and spent more time making it symmetrical.
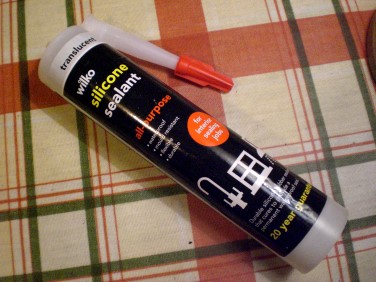 Instead of a two-part silicone mix, I decided to experiment with ordinary, cheap as chips, silicone sealant (also known as silicone caulk).
At this stage, I had no idea how well this stuff would take exposure to molten pewter.
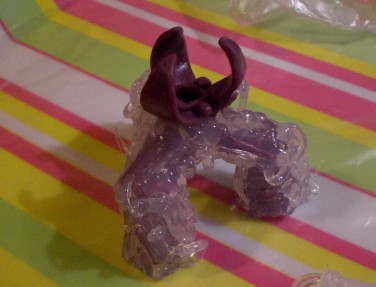 I added sprue pegs to the wax form, then stood it on a flattened polythene bag on a tray - knowing that the silicone won't adhere to polythene.
I started applying the silicone - it wasn't easy, as it's quite thick and viscous. Even after hardening the wax in the fridge, it was difficult to get the sealant to conform to all the little details of the wax form without distorting it out of shape.
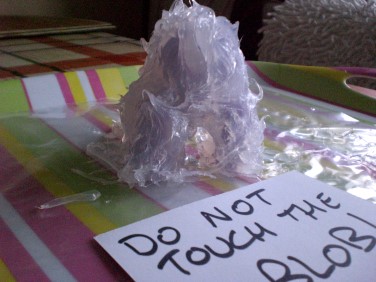 The sealant went on really thick and not very evenly.
I fully expected this to mean that there would be voids and bubbles next to the wax, which would result in flanges and general surface imperfections.
It took a whole week for the stuff to cure - just because it was such a thick, chunky layer.
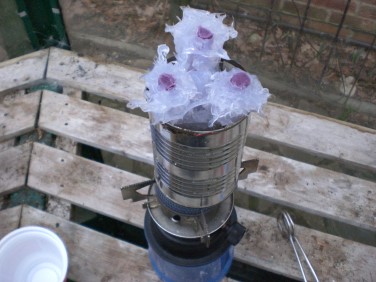 Melting out the wax was a challenge - I didn't really want to do it in the oven, in case the silicone emitted fumes.
So I settled for immersing the mould in boiling water, in an old food can over my portable gas stove.
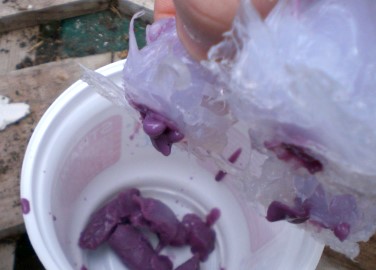 The wax was a little reluctant to come out, but a few more repeats of boiling and tipping seemed to get it all.
The wax coming out was very odd in texture - feeling sticky and wet even after cooling. Not necessarily a good sign...
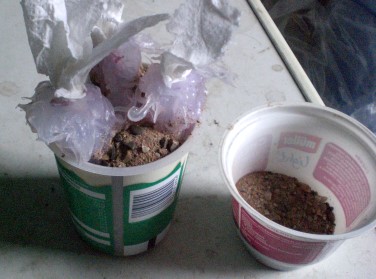 I dried the mould for a few hours next to my hot water tank, then prepared it for casting.
I wasn't completely confident that the mould was completely free of holes, or indeed that it wouldn't just burst into flames when the hot metal hit it - so I set it in a pot of sand (blocking the pouring holes temporarily with tissue to keep stray sand grains out).
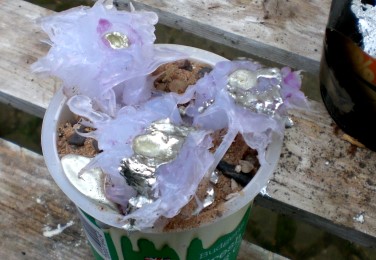 As in previous experiments, I melted parts of an old pewter tankard in an empty food can over my camping stove.
It was a messy pour this time - but this isn't really a problem, as the spillages set quickly and can just be re-melted again next time.
It seemed to fill the mould OK though - and didn't spit, flare or otherwise give me much trouble. I left it to cool for half an hour.
The Reveal
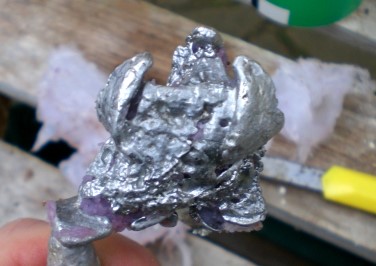 I cut open the mould (this was always intended to be a single use experimental mould).
The casting was a pretty disastrous mess. A huge unwanted lump of metal in between the petals - and a generally poor finish and shape everywhere.
This won't be wasted, of course - it just goes back in the pot for the next melt.
What Went Wrong?
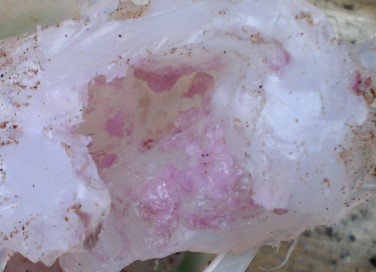 A close inspection of the mould remnants revealed that parts of the silicone - particularly in the middle, at the thickest point, had not cured properly - it was a sort of semi-cured paste, which had been displaced during removal of the wax, filling parts of the mould and opening up voids in other places.
What Next?
Well, this isn't a failure, it's just... data capture. I think this material has potential - The silicone itself can easily stand the heat of the molten pewter - it's just going to need a bit more ingenuity in the application.
So next time, if there is a next time, I'm going to try freezing the wax form to make it solid, then applying the silicone in thin layers with a brush.
