The Beadmen Are Back
By Mike on Monday, April 22, 2013, 12:39 - Permalink
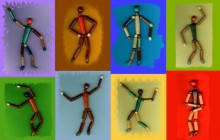 Years ago, before the Atomic Shrimp website existed, I made some little bamboo and wooden mannequins, which I called The Beadmen.
Now, at last, it's time for them to come home.
- Except this time, the Beadmen are Open Source! - If you're not one of the select few who finds one of the Beadmen I distribute, here's how to make one for yourself:
How To Make A Beadman
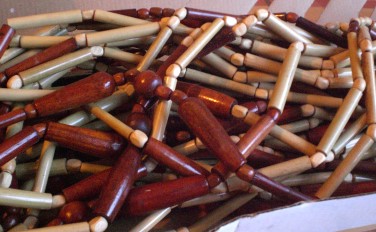 My Beadmen started out life as a bamboo beaded door curtain. It's possible to buy the beads loose, but buying an item made of beads, then dismantling it, is often a much more economical way to go.
In this picture, you can actually see the sort of chance arrangement of beads that made me think of this idea in the first place - the tapered bead looks sort of like a torso, and the round bead like a head...
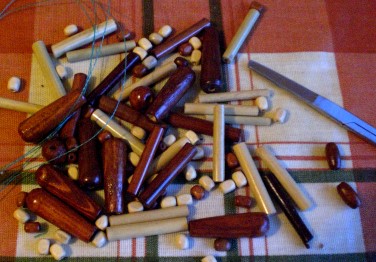 Snipping off the bottom bead from one of the strings yields a double handful of different shapes, sizes and colours of beads.
In addition, there is also the length of strong polymer cord on which the beads were threaded - this will not go to waste - in fact, it's absolutely essential to the construction of the Beadman.
Select The Beads
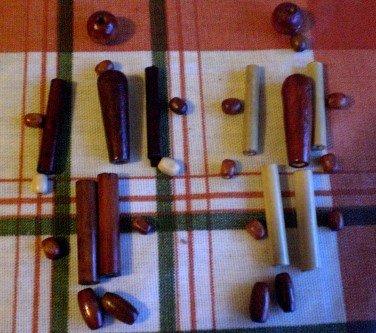 To make the Beadman, it's necessary to select suitable beads for head, torso and feet, plus two pairs of bamboo tube beads for the arms and legs.
Additionally, a small roundish bead will be needed for most of the joints (including a pair - not pictured here - for the shoulder joints).
The bamboo tube legs and arms need a joint midway along their length, so we'll need to cut them in half
Drill Holes For The Arms
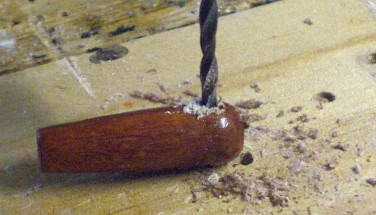 Most of the beads have all the holes they need quite naturally, but the torso needs holes for the arms - these can be drilled through in a single operation, pressing the bead hard against the bench or a scrap of wood when the drill breaks through the other side, to prevent splitting.
Cut The Bamboo Tubes To Size
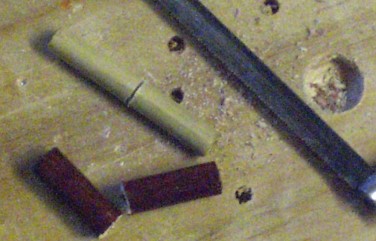 The bamboo tube beads need cutting in half. Bamboo is a very fibrous material that splits and splinters easily, but a little care will prevent this being a problem.
Score all the way around the section first, using a pull stroke with a junior hacksaw (this will prevent the outer layers of the bamboo peeling away), then it should be possible to continue sawing gently, cutting the piece neatly into two halves.
Prepare The Head And Hands
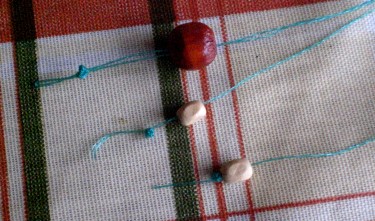 The cord needs fixing into the head and hands - a single strand for each of the hands and a double for the head.
Tie a knot that is just small enough to pass (tightly) through the hole in the beads that are to be used.
The cords will be secured into the beads using glue from a hot melt glue gun.
Glue The Cord
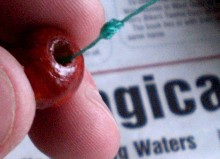 Hold the bead and cord in such a way that the knot stands a little way proud of the bead. Deposit a blob of hot melt glue into the hole, then pull the cord gently so that the knot enters the hole, hopefully catching on the glue and becoming firmly stuck in place.
When the glue is fully cooled, give the cord a few tugs to make sure it's well stuck in place (some will inevitably fail and need re-gluing).
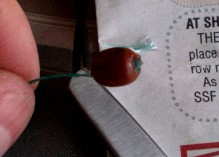 Once you're sure the bond is good, trim off any short tail of cord protruding out of the bead.
Thread Up The Arms
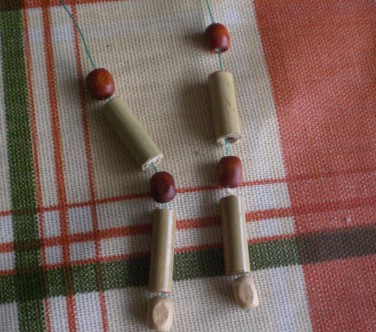 Assemble the arms, consisting of the glued-on hand, a section of arm, a small bead for the elbow joint, another section of arm and one more small bead for the shoulder.
It's a good idea here to make sure that the two arms match, and switch around some of the pieces if they don't.
You can, of course, select two quite different bamboo tube pieces for the arms, then - after cutting both in halves, select one half of each for each arm.
Join The Arms To The Torso
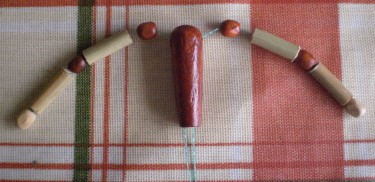 Thread each of the arms through the drilled holes in the sides of the torso bead, threading both cords down and through the bottom of the bead.
The inside of the bead might not be smooth, so it might be necessary to help the cord on its way using a skewer or toothpick.
Add The Head
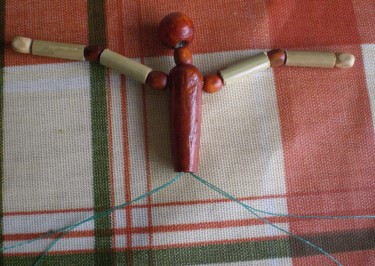 Add a small bead for the neck joint and thread the two cords from the head straight down through the torso.
Separate the cords at the bottom - on each side, there should be one cord from an arm, plus one from the head.
(This is why the head needed two strands of cord - so that everything can be kept balanced and symmetrical - besides, it will become apparent later on why a total of four cords are needed...)
Thread Up The Legs
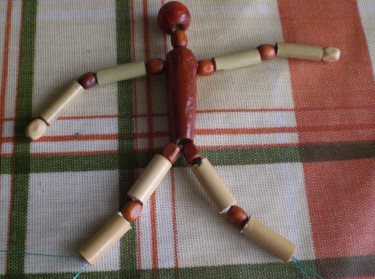 Carry on threading beads - so for each leg: a small bead for the hip joint, a section of leg, another small one for the knee, then the other section of leg.
There is no small bead for the ankle joint - the foot will just attach directly onto the bottom of the leg.
Attach The Foot
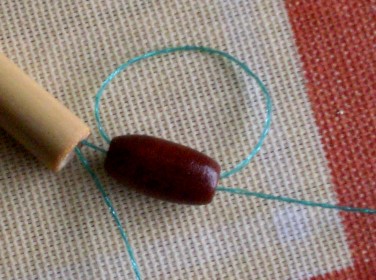 On each leg, thread one cord through the oval foot bead, then loop it back around and through again.
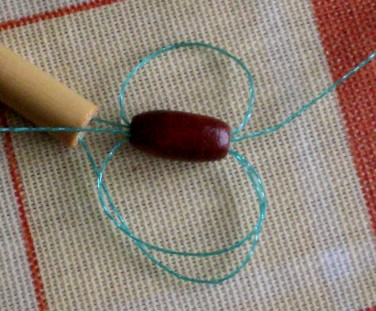 The other cord needs to go into the other end of the bead first, then out of the top end of the bead (so the two cords are threaded through the same foot bead in opposite directions).
Loop the second cord back around and thread it through again.
At the end of this, each of the threads is threaded through the same bead twice, but in opposite directions.
Pull on the two cords to take up the slack (bringing the arm and neck into proper tension - not too tight though).
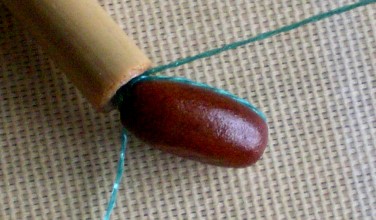 Knot the two cord ends together several times - it should be possible to contrive to make this knot happen at the point where the top of the foot bead meets the bottom of the leg (i.e. the ankle).
Make sure these knots are secure - if they loosen, the Beadman will fall apart.
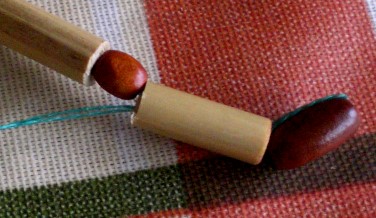 Thread the spare ends of the cord back up along the lower joint of the leg, then carefully trim them off at that point.
This keeps them long enough to prevent the knot undoing itself, but hides them out of the way, keeping a neat finish.
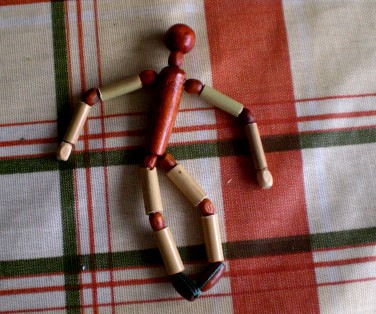 And that's it! - The Beadman is ready for action.
Assuming you've judged the cord tension right, the joints should be loose enough to be somewhat posable - although the Beadman will be as floppy as a ragdoll, so he won't hold a pose on his own.
By gearing up a production line process where all of the drilling, cutting and gluing is done in batches, it's possible to make quite a lot of Beadmen all in a fairly short time. Have fun!
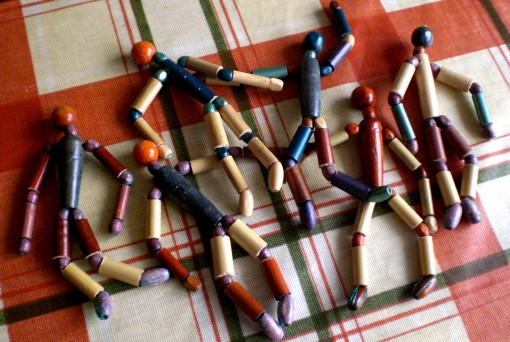
What Are The Beadmen For?
The original Beadmen were made in quite limited number and deposited in public places for people to find and keep.
That's really about all of it. I just wanted to create some little random surprises, and see how people would react to them.
They were distributed across a wide range of locations, mostly in the UK, but a few also found their way to America, Australia, Canada and parts of Europe.
I created a simple website with a message board on it, so the people finding the Beadmen could post feedback (each Beadman carried a paper tag with the URL on it). The site is sadly now gone.
The Return Of The Beadmen
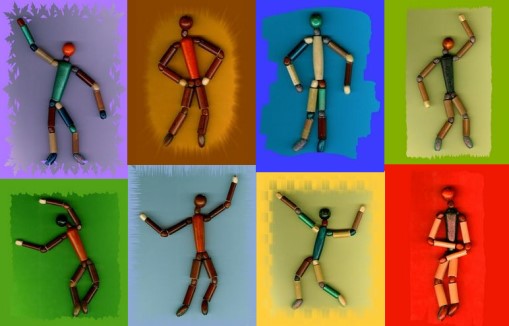
I've been meaning to bring the Beadmen into the Atomic Shrimp domain for quite a while. I'll still be making them and leaving them places for people to discover and keep, but now, they'll be little wooden ambassadors for this site.
Found A Beadman?
If you've found a Beadman, it would be great to hear from you - why not post a comment at the foot of this page?
