Making A Cider Press
By Mike on Sunday, September 15, 2013, 19:44 - Permalink
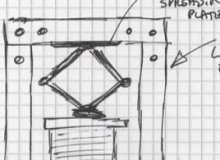 Here's a project to make a cheap and simple press for apples (and maybe cheese), from readily available materials and components.
This is going to differ from some of my previous projects in several ways, but most notably - it needs to be quick (at the time of starting, the apples are already nearly ripe), and it's going to be properly designed - there will be no guesswork or cut-first-then-measure.
Possibilities
Before starting, I sketched out a few design possibilities - the first one is mechanically very simple - essentially a scaled-up nutcracker - a lever is used to turn a large movement with small force (provided either by a person leaning down on the lever, or a Spanish Windlass) into a small movement with large force:
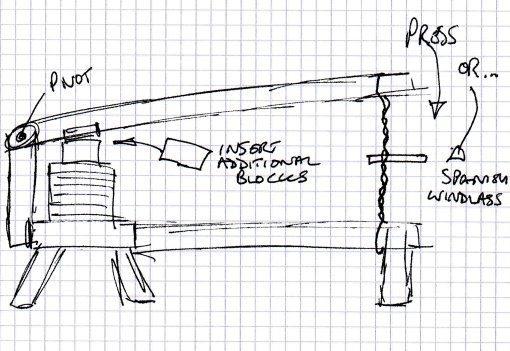
I decided against this design for several reasons: the long levers would make it unwieldy to transport, the action of the press would not be perfectly vertical (so there might be a tendency for the pressed layers to squirt out to the side), and the single action may make it difficult to apply force evenly and smoothly.
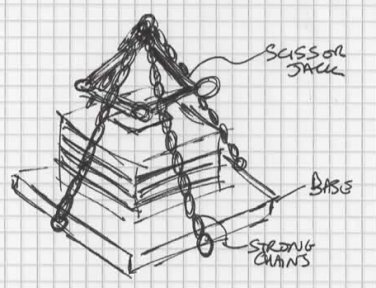 The next design possibility comprises a stout, solid square base with two loops of strong chain - ends attached to each of the four sides (or maybe corners). A scissor or bottle jack strains against the crossed chains, providing downward force against the press plate.
I decided against this one because strong enough chain turned out to be quite expensive, and the design, although interesting, is as far as I know, unproven.
Convention
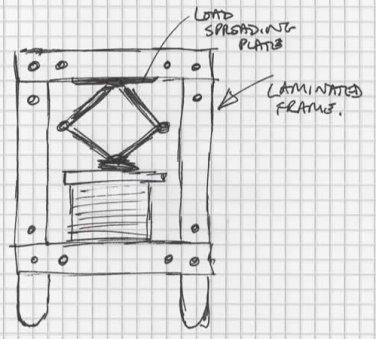 There's sometimes a reason why everyone does things the same way - and this is an occasion where I am going to resist the temptation to depart from convention. Well, mostly.
My cider press will be a strong rectangular frame that constrains a scissor jack enabling it to press down a thick wooden board against a strong, flat base.
The slight departure from convention I mentioned above will be in regard to the material and method of construction - the usual advice is to frame the press using beams of oak or other hardwood, on account of strength.
However, it's not impossible to make strong beams from softwood - the trick is to choose straight-grained timber, to avoid placing large knots at stress points, and to glue-laminate multiple layers to increase stiffness and so that any imperfections in one layer are supported by other layers.
Also, over-engineering the size of the timbers will help.
Design, Design, Design
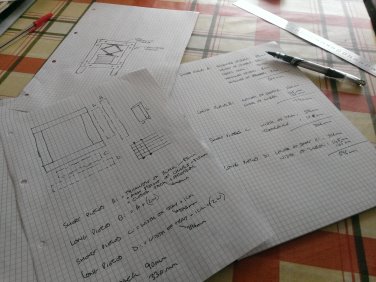 I'm determined not to let this project become complex, or drag on because of mistakes or poor choices made at the start.
So I've drawn up designs, calculated the necessary sizes of all the components, worked out where the fixings will go - I've even spent time calculating the depth of the press based on the optimum use of the 250mm travel of the scissor jack I will be using to apply force.
Materials
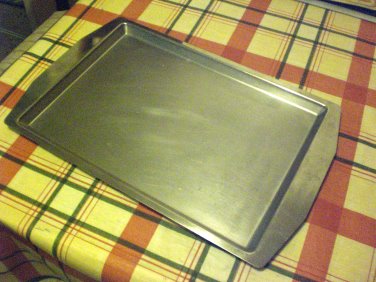 I was fortunate enough to pick up this lovely stainless steel tray for just a pound in a charity shop - the internal dimensions are about 25 by 45cm. This will be placed on the baseplate of my press and will serve to collect all of the juice.
The tray, although made from heavy steel, will not itself be strong or stiff enough to form the bottom part of the press, so it will stand on top of the built wooden bottom of the press and will be supported across the full width and depth of the press area.
I will need to drill or cut a spout in it, so the collected juice can be drained off.
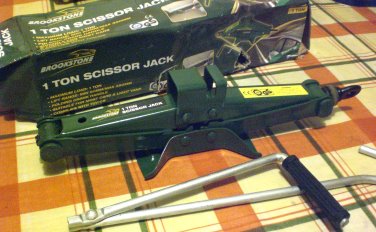 The press force will be provided by this scissor jack - it's only 1 ton capacity, but this should be just about enough for this little press.
I'll need some kind of metal socket to spread the force of the top end of the jack, to prevent it crushing the timber.
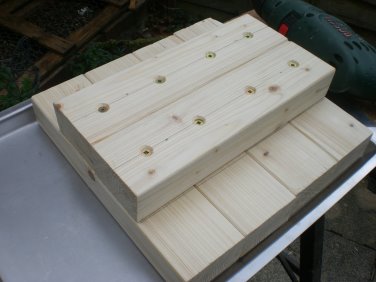 The top plate of the press is made from CLS framing timber - four pieces side by side happened to be almost exactly the right size.
The timber is too porous to come into direct contact with the fruit being pressed though - I'll be fixing a square of plastic on the bottom of it - cut from a cheap polypropylene chopping board.
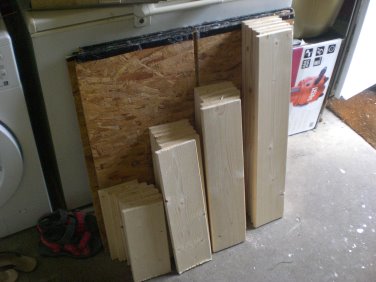 My timber is square planed pine, 18mm x 146mm - I bought 8 lengths of 2.4 metres, which should be enough.
My plan and cutting list came in really handy here - I was able to cut all of the components to size in one session.
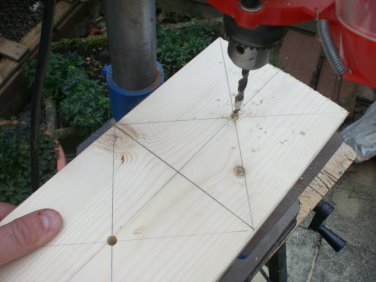 I made a template for drilling the pieces - this made it easy to place all of the holes consistently without any further measuring and marking.
The timbers are cut and configured in such way that the frame will be self-squaring when assembled - the square end of one timber will butt closely against the edge of another - so it will be almost impossible to build the made load frame out of true.
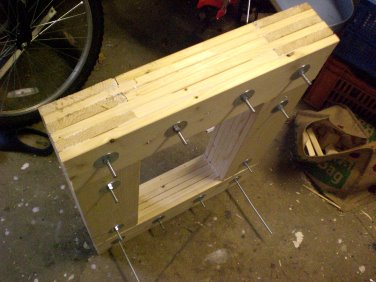 The frame went together quite nicely - although everything was a little tighter fit than I thought it would be.
The timbers are glue laminated, then clamped together by means of M8 threaded rod with large flat washers. The final strength of the frame will be in the timbers and glue, not the bolts - but I'll probably leave them in place anyway.
Next steps will be to laminate further pieces on the bottom, to support the steel tray.
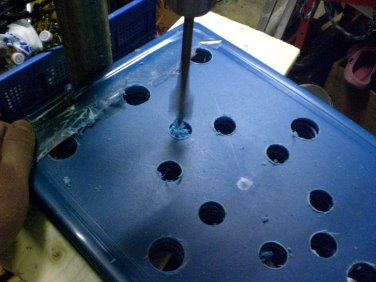 The apples will be pressed in cloth-wrapped layers, which need to be separated by slotted boards - the purpose of these is to provide stability and to create channels for the juice to run out more easily.
Mine will be made from polypropylene cutting boards - so I stacked them up and taped them together, then drilled through them all with a spade bit (this made a phenomenal amount of mess on the garage floor - the plastic shaves away in crinkly ribbons that bulk up to many times the volume of the hole they are cut from.
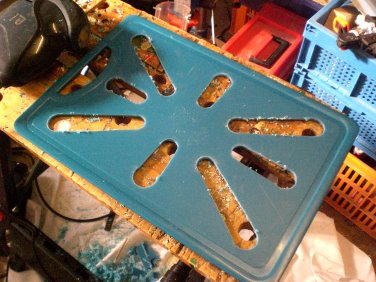 I cut between the holes with an electric jig saw,
Later (after this photo), I tidied up the ragged edges with a small file - the tatters of loose material scraped off quite easily.
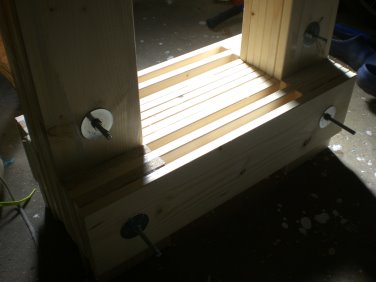 I finished the base of the press by adding two additional horizontal sections on either side, spaced out by smaller pieces of timber.
The smaller pieces extend downwards below the load frame of the press - forming feet, which serve to raise the whole press off the ground (important, as I need to be able to get a jug or bowl under the tray to collect the pressed juice).
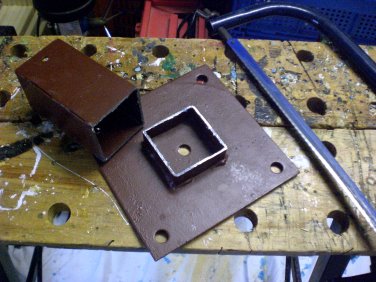 The scissor jack has its own load spreader on the base, as it's designed to be used sitting on the ground, but the top of the jack is just a small rectangular part with a slot in it - if I were to allow this to press directly against the wood of the load frame, it would dig into the timber and this damage might propagate into breakage under load - so a load spreader is needed for the top too.
After a long search, I found a bolt-down post fixing socket, which when sawn off, was just right. This will be tidied up with a file (including rounding off the corners of the base plate) and affixed to the underside of the top section of the load frame.
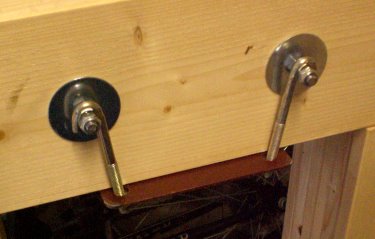 I fixed the load spreader in place with hooked bolts, looped over the threaded rods that were used to clamp the frame laminations together.
This was preferable to screwing it directly into the frame - because anything that penetrates or damages the timber could cause it to fail under load.
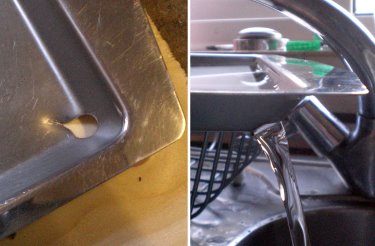 I drilled a hole in one corner of my steel tray, then creased it by hitting it with a brick chisel, to form a little spout to prevent the liquid from dribbling back along the underside of the tray.
I tested this over the kitchen sink and it worked perfectly.
And that's nearly everything - the cider press is all built - all that's left to make is a frame to help form the layers of apple pulp, and some cloths to wrap them.
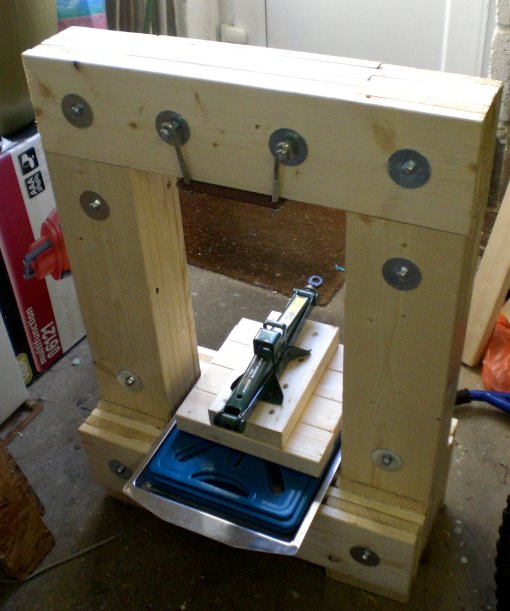
I need to wait a week or so now, to allow the glue to cure fully, then we can test it!
It's not the prettiest thing in the world, but maybe I'll decorate it a little once I'm sure it actually works.
Getting Ready
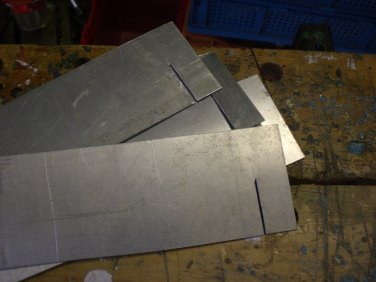 I cut four pieces of aluminium sheet for the pulp frame - half-slots in each end will intersect so that they can be fitted together to make a box.
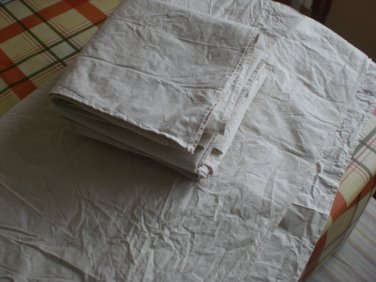 Jenny made some squares of thick cloth for me - these will be used to wrap and constrain the pulp while it is pressed.
The cloth is tough and non-stretchy (so it won't give or burst), but with a weave open enough to allow the juice to run out.
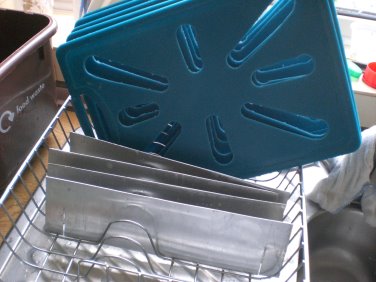 I gave the separator boards and pulp frame parts a good scrub to remove any loose bits of plastic or metal filings.
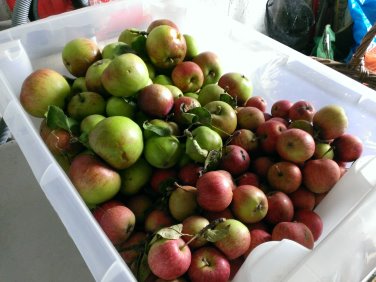 Finally, I went out and picked a mountain of feral apples of all shapes, sizes and colours. (three or four times as many as shown in this photo)
Some of them are small, sharp and tannic, others are huge and sweet and juicy - these will be blended with some named varieties and should produce some fantastic juice for fermenting into delicious cider.
As many of these feral apples were picked off the ground (having either fallen there naturally, or when I shook the tree), they will be scrubbed in a mild sterilising solution, then rinsed in clear water before pulping - this is to try to remove as much soil and soil-borne bacteria as possible - because that can really ruin the cider fermentation process.
Pressing Day!
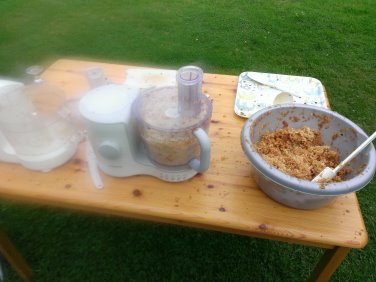 The afternoon of 22nd September was perfect - dry, overcast, but mild.
We started a four-person production line - washing, chopping then shredding apples using a pair of food processors (seen here in the soft focus of a smear of apple juice on the lens of my camera!).
The food processors did a reasonable job, but it was quite slow and labour intensive processing the apples this way.
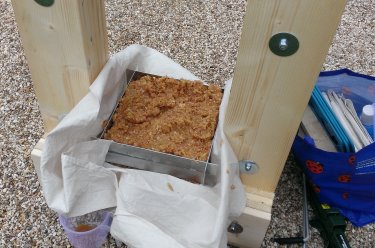 Once we had enough pulped apple, we started loading the press (by this time, surrounded by a cloud of intensely curious wasps).
Loading the press comprises: put down a board, lay down a cloth, place the pulp frame and fill it, lift off the frame, carefully wrap the cloth over and tuck it, then add the next board and repeat.
Even at this stage, with no pressing force in action, a slow trickle of juice starts to run from the tray nozzle - so we made sure there was a jug there right from the start.
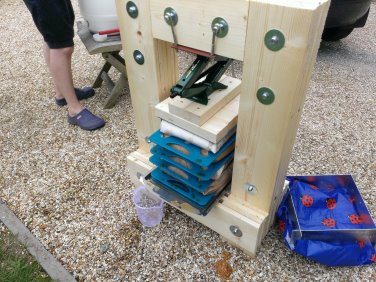 The press has capacity for five cloth-wrapped layers of apple pulp - and we ran three pressings of pure apple (then one mixed, which I will describe in a moment).
The first pressing was a bit tricky and we quickly learned that it was better to pull the cloths tighter over the top of the pulp, as pressing force tends to spread the layers risking them overhanging the tray, or catching on the vertical beams of the press.
Under just a little compression, the juice flows readily. The juice is tawny amber in colour because the apples turn brown within seconds of being shredded - this could be avoided by adding citric or ascorbic acid to the process, but there is no need for this - it tastes fine regardless of colour.
Three full pressings of pure apple pulp nearly filled a 5 gallon plastic brewing keg for making into cider.
The first pressing of ripe dessert apples produced very syrupy, sweet juice - loads of sugar for the fermentation, but somewhat lacking in bite and acidity.
So for subsequent pressings, we mixed in a variety of smaller feral apples - some of which were juicy, but too bitter to eat raw - this added acidic and tannic sharpness to the mix, and it should hopefully ferment into a delicious tangy cider.
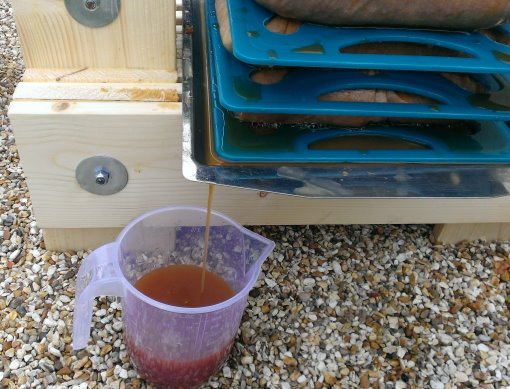
Once we had enough apple juice, we did a fourth pressing of a mixture of apples, pears and blackberries - producing about 7 litres of rose-red juice that is well-balanced between sweet and tangy, but with a delicious aroma. I'll ferment 4 litres of this in a glass demijohn - the rest is for drinking fresh.
We got a fairly good extraction of juice, I think - because when I shook the pomace out of the cloths after pressing, it was quite dry and crumbly.
Conclusion
It works! - It actually works!
Now that I know this press works, I can set about making a motorised apple mill - this should dramatically ease and speed up production.
It's also interesting to note that, contrary to common advice, it is possible to build a working press out of softwood - it just needs to be sufficiently over-engineered.
Video
Here's a video of the press in action:
Apples
I don't actually have any apple trees in my garden, so it might seem a bit strange to be building a press for them - but really, getting the apples is the easy part - I can find plenty of feral apples in the hedgerows, beg them from neighbours (or pay them back with a share of the juice), or maybe volunteer to help picking at an orchard, and take my payment in kind.
Beyond Apples
This can be used to press other things - other fruits such as elderberries, which are abundantly available, but always problematic to extract the juice. Cheeses, which should enable me to make some nice firm curds - and maybe even other things that aren't for human consumption - the press could be used as a clamp for glued laminations, for example.
Note
Before, during or after the video(s) embedded in this page, the player may display advertisements or links to additional videos - these are not affiliated to Atomic Shrimp and the selection is something over which I have no control.
