Plastic Moulding - Using Recycled Bottle Tops
By Mike on Wednesday, June 15, 2011, 19:29 - Permalink
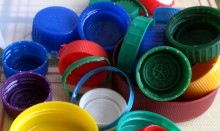 Although modest in the scale of its end result, in concept, this may well be my most ambitious recycling project yet. This is an attempt to mould a new plastic handle for my favourite kitchen knife, using recycled plastics, without any of the proper injection moulding equipment.
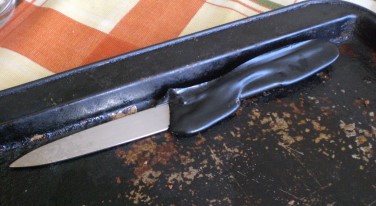 Disaster! My favourite little kitchen knife - a Victorinox tomato knife - got accidentally left on a baking tray and put in the oven, ruining the handle.
An understandable mistake - after all, the handle of this one was the same colour as the tray, but still, the sort of thing you can't help kicking yourself over.
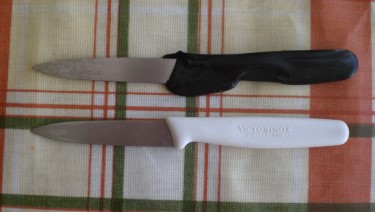 I used this handy little knife for as much as half of all the food prep (that requires a knife) in the kitchen, so I'd miss it.
I guess it wasn't the end of the world - although excellent, these knives aren't expensive - and I even had a spare (seen here alongside the melted one), but could the damaged one be repaired? I decided to have a go...
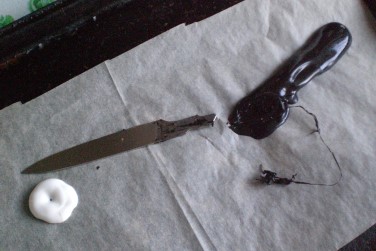 First thing to do was remove the melted handle - so, back in the oven on a sheet of silicone paper and the handle was easy to pull and scrape off.
I planned to use HDPE (High Density Polyethylene) plastic bottle tops to make the new one, so I took this opportunity to try melting one - that's what the white plastic blob is in this photo - it melted easily to a soft pliable mass at 150C.
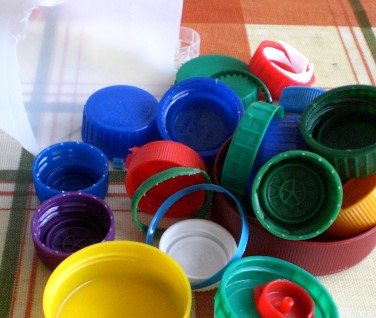 Nextly, I needed some material to recycle. I couldn't decide on a colour - in fact, I decided to use every colour I could lay my hands on.
Yes, I'm slightly ashamed to say that over the course of a week or so, I actually bought bottled drinks choosing them on the basis of the colour of bottle top!
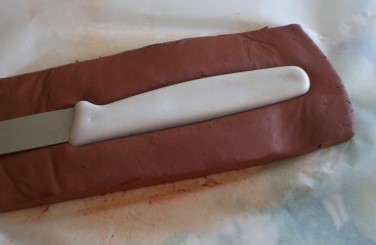 But what to use for the mould? Ideally, the mould would be made out of two mating pieces of metal, with a carved hollow in the desired shape - and into this, the molten plastic would be forced under pressure.
I haven't the wherewithal to do any of that, so I made my mould out of air-drying craft modelling clay - the upside of doing it this way is that I could just make the mould by pressing my spare knife into it.
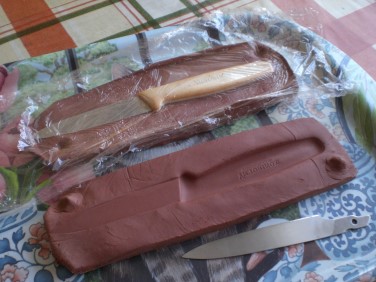 Once the first half of the mould stiffened, I pressed another slab of clay on top - using clingfilm to stop the two halves just sticking together.
The bumps at the corner of the front mould piece are there on purpose - when the top slab was pressed on, these bumps formed matching dimples - these paired features were designed to ensure that the two halves of the mould were easy to mate together in the right place.
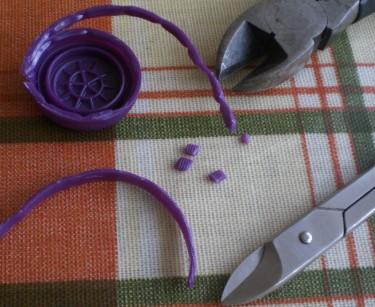 While the clay mould was drying - a process taking a whole week - I cut up my bottle tops.
I did this using a pair of toenail scissors and a side cutter - this was really laborious work, leaving blisters on several of my fingers, but I made the effort to cut the pieces as small as possible - about 1 to 2mm square.
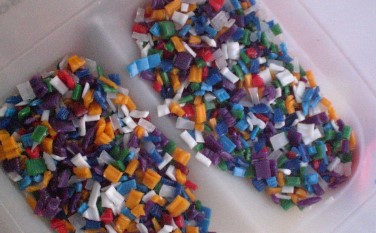 I ended up with about a handful of recycled plastic granules in a lovely variety of colours.
Not all plastic bottle tops are the same kind of plastic - so I checked them carefully - HDPE plastics should be marked with a resin recycling code - this looks like a triangle with a number in it (and that number should be 2 in the case of HDPE).
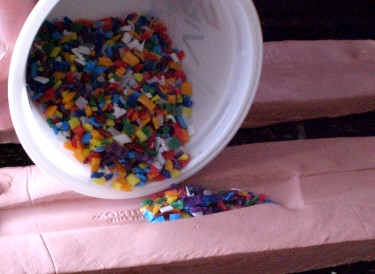 Once the clay moulds were really dry, I placed them on a metal tray - as it happened, the same tray on which the original handle was destroyed (is it silly that this little bit of coincidental symmetry was a bit heartwarming?)
I shook in a layer of plastic granules, to a level proud of the top, in both halves - because I was expecting the material to pack down as it melted.
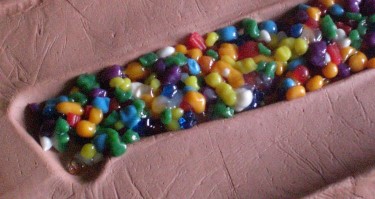 After ten minutes at 150C in the oven, the plastic granules had clearly softened and packed down - I topped them up, added the blade and put it all back in the oven for another five minutes.
This was when things nearly went wrong. Clearly, the air-drying clay isn't the best mould material, as it started to smoke and fume a bit in the oven.
But I'd come too far to give up now, so I opened all the windows and turned on the extractor fan and waited it out.
When the second batch of plastic granules had melted, I whisked the apparatus out of the oven, quickly checked the positioning of the blade, then pressed the two halves together, hard. Obviously, this was all done with gloved hands.
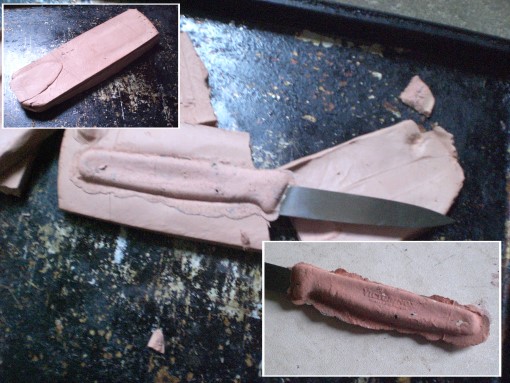
To minimise distortion, I left the mould to cool for half an hour. After this time, I broke away the clay to examine the result - it appeared to have worked, but the new handle looked to have a bonded shell of clay...
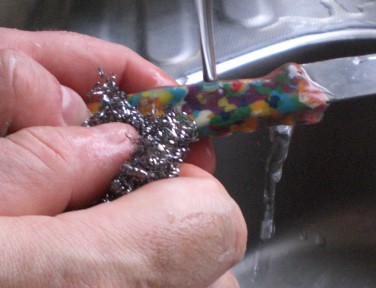 Not to worry though - a quick scour under running water removed the clay coating from the new handle.
I trimmed off a few stray flanges and bumps - all in all, it looked to be a fair result.
The End Result
I'm fairly pleased with this - it's not perfect, but it's pretty - and it's unique and just a little quirky, which I like a lot. It's a bit smaller than the original, due to the way clay shrinks as it dries.
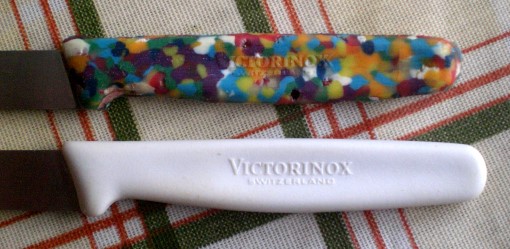
There are a few voids here and there, but it's a strong, stout handle that has bonded firmly around the surprisingly short tang of the blade - it works, and as a first attempt at this kind of recycling, it's a resounding success.
What Is This?
This isn't injection moulding, because there's no injection involved. This is probably best described as forging - a term normally reserved for describing the crafting of metals, but this technique probably is forging nonetheless.
What Next?
Different mould materials - clearly, air-drying clay isn't suitable - ideally, metal, but this will depend on what I'm trying to make. I have an idea for how a mould could be built up from layers with profiled holes in them - which should be easier to manufacture than a mould cavity in a single block of metal.
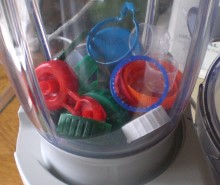 Mechanical shredding of the plastic material - for any kind of serious production, snipping the plastic manually just isn't going to fly - I tried shredding them in a food processor, but it just made a horrible noise as if it was going to tear itself apart, without actually breaking up the lids.
I think some kind of toothed grinding device would be better - I wonder what I can improvise...
Further Experiments
The resounding success of this project spurred me to undertake some experiments on the properties of recycled HDPE, with a view to tackling larger (perhaps *much* larger) projects - take a look here for more details...
