Making A Recycled Plastic Boat
By Mike on Sunday, July 31, 2011, 22:48 - Permalink
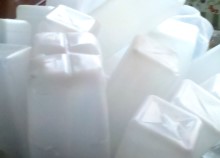 Many of my past projects have thumbed their noses at convention or have been absurd, foolhardy or otherwise non-conformist, but this one extends the boundaries further than ever.
I'm going to try to make a boat by recycling plastic bottles.
Before You Read Further...
Sadly, due to a host of technical problems and setbacks, this project didn't come to fruition - and was formally cancelled in October 2012 - details at the foot of the page.
Collecting And Processing The Materials
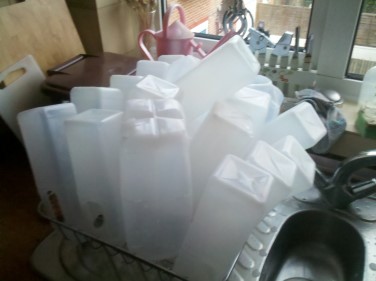 Thanks to the assistance of friends and colleagues, I'm collecting up to a dozen HDPE plastic milk bottles a day. I give these a thorough wash and dry.
I'm also collecting upwards of 100 HDPE plastic bottle tops a week, which come in a wide assortment of bright colours.
I cut the bottle tops into quarters using garden secateurs and the bottles into long strips, which I then cut up into postage stamp-sized flakes, ready for the next stage. This is all hard work.
Approach
Here's the plan. I'll grind up HDPE bottles and caps, remould this (using a flat sandwich press) into fairly uniform circular pancakes, which I'll arrange in a hexagonal grid pattern and weld together (using a clothes iron) into larger flat sheets of plastic.
I'll construct a simple wooden frame onto which I'll affix panels of the recycled plastic, welding them together along the seams using a hot air gun.
The frame will be constructed of laths, glue laminated together to form curved chine logs, with a few supporting struts.
The form of the boat will be a small, flat-bottomed canoe - something like a Pirogue, but with decks at each end, making it also a bit like a kayak.
Lessons Learned
One really important thing I've learned from the build of my previous boat build (the Snow Pea) is: don't wildly deviate from convention, unless you have a good reason to, and unless you properly test your changes - so in terms of overall design, this boat will do what already works - flattish bottom, pointy at the ends, broad in the middle.
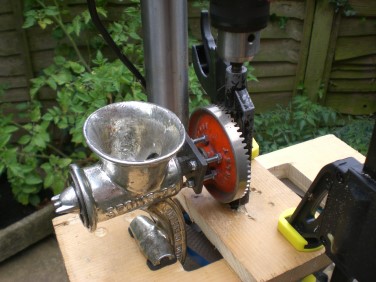 This is my drill-powered-drill-powered mincer. It's a traditional meat mincer, driven by an electric pillar drill, via the gearing mechanism of an old Stanley hand-powered drill.
I feed the quartered bottle tops and bottle flakes into this machine at a moderate pace and it grinds them up into small, manageable pieces.
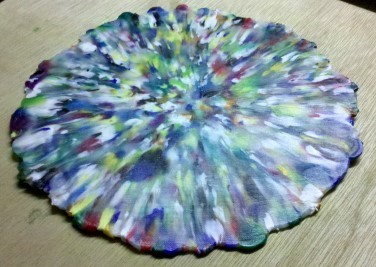 I convert a carefully-weighed portion of ground plastic into a circular recycled 'pancake' by pressing it between two sheets of re-usable baking sheet (more details of this whole process over here).
These pancakes are convenient to store - so I can just stack them up in a box until I'm ready to start construction ot the boat.
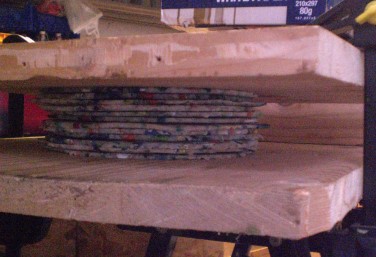 If permitted to cool too rapidly, or without being constrained flat, the pancakes tend to buckle.
I've discovered that by stacking a whole load of the plastic pancakes together from hot (but cooled enough not to be sticky), they can be clamped flat and the bulk stacking makes them cool slowly - thus they end up nice and flat.
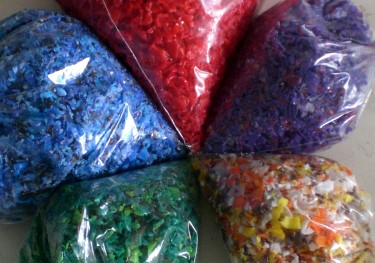 Most of the plastic is just ground up together and mixed, which means the pancakes come out randomly mottled.
I decided it would be nice to introduce a bit more variety, so I also ground up some bottle tops grouped (more or less) by colour. I can add a pinch of these individually or in combination as part of the makeup of a piece and introduce a colour bias that I hope will make the end product look interesting.
 The circular pancakes are welded together by clamping them in position, sprinkling a measured portion of ground plastic into the gap between them, covering with a sheet of reusalbe baking paper and ironing it all until fuse.
There will be a need to clamp flat again when I scale this up to the full build.
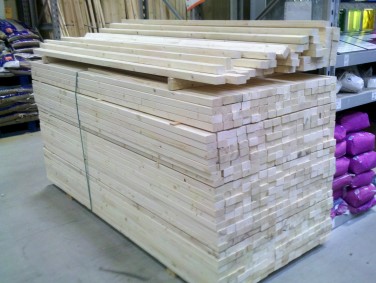 I did toy with the idea of trying to use recycled timber for the frame of the boat - I saw some that looked promising in a skip at the back of Debenhams in Portsmouth, but I had no way to get it home - and going back there with the car would have cost as much as just buying timber.
I don't need anything elaborate though, so I just got a few pieces of very cheap framing timber. If you take a little time to sort through the stack, you can often find lengths that are almost knot-free.
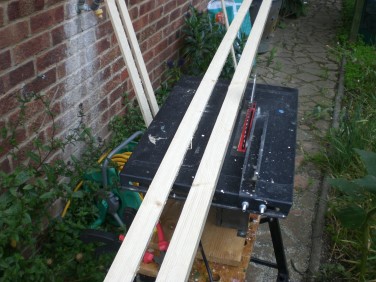 I ripped the framing timber into laths about 9mm thick on my cheapo table saw.
These will be thin enough to take the amount of bend I have in mind, but thick enough that I'll only need to laminate two of them together to make each of the bottom chines.
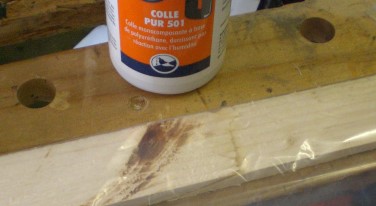 The laths aren't long enough though - so I cut some in half and joined the halves onto the full lengths with a scarf joint glued with polyurethane glue.
When I laminate the strips together, I'll make sure these joints aren't in the same place on both strips.
So now I have four laths, each about 3.6m in length - a little under 12 feet. That's perfect - a little length will be lost in trimming and they'll make a frame about 11 feet in length (bending them around the leaf shape of the bottom will shorten the overall length).
Constructing The Bottom Frame
I've started construction of the bottom frame - the laths are laminated onto a pair of small wooden blocks at either end, spaced apart by a single bar in the middle. The ends of the bar are cut with a 10 degree outward lean, to give the sides of the boat a little flare in the middle.
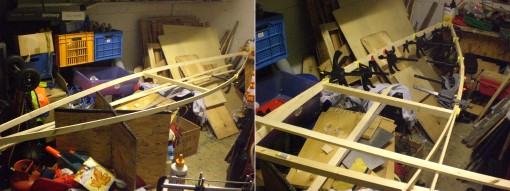 I don't have enough clamps to do all of the lamination in one go (you can never have too many clamps), so I'm doing half of both sides - because laminating the whole of one side, then the other would be quite likely to introduce serious distortion of the symmetry.
Because polyurethane glue foams and expands as it cures, I took care to clamp past the point where I had applied glue - or else there would have been problems closing the remainder of the gap next time.
This boat is going to be a bit larger than I first visualised - not bigger than the numbers I had in my head, I just hadn't properly thought them out - it's approximately 11 feet long by 2 foot 6 wide at the bottom frame (about 3.5 by 0.75 metres) - that's a trifle longer than the Snow Pea (and obviously wider, because width was the Snow Pea's key deficiency).
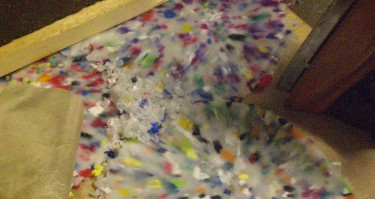 To join the plastic pancakes together, I arranged them on a flat board, heaped a little ground-up plastic in the middle, then ironed it all together with a clothes iron on high heat (through a reusable cooking sheet)
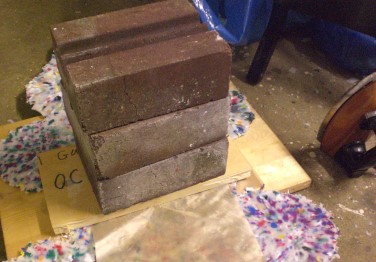 The weld is held down flat with another board and a stack of heavy bricks. This isn't a speedy process, as it needs to be repeated on both sides. but I'll hopefully get there in the end.
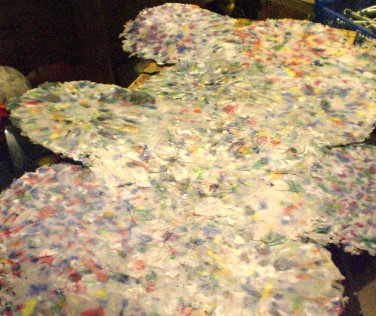 In what seems to be a continuous cycle of progress and setback, it turns out that the pancake-welding technique isn't scaling up well.
It's hard to get the right amount of additional plastic into the void between three pancakes - and getting this right means heating and reheating the same areas, from both sides - this causes the sheet to warp and buckle. Not good.
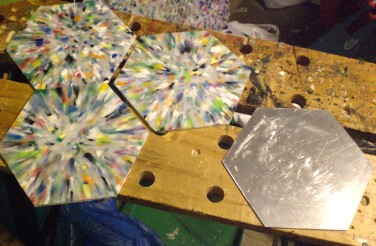 So I'm going to try a different approach that I considered earlier and has been suggested by others more than once. Cutting the pancakes into closely-fitting hexagons.
This is fairly easy - I made a sheet metal template, clamped it in place and scored around it with a heavy duty knife - then the edges just snapped off.
There's very little waste this way and the hexagons tile together very neatly. I'll weld them by applying a narrow heated bar to the joint - so I only need melt just enough to make the two pieces unite.
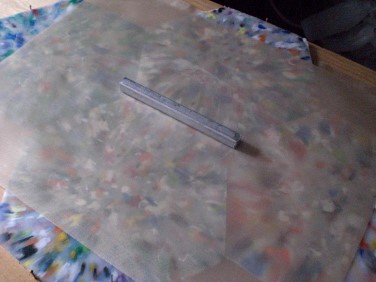 I needed a piece of metal that was fairly narrow, but thick enough to isolate the iron from the plastic, heat-conductive and fairly easy to work.
I rummaged through my boxes of junk, but found nothing suitable, but I knew I'd find something I could use at the Malthouse.
Sourcing Materials
Some of the materials and tools for this and many of my other projects were sourced from the Malthouse in Botley.
 Officially named 'Botley Bathroom Centre', and ostensibly a bathroom and plumbing store, the ground floor of the Malthouse is a cornucopia of interesting, useful and esoteric hardware - racks, boxes, buckets and heaps of assorted bolts, nails, brackets, hooks, fittings and fasteners, rods, rivets, hinges, and many other items I don't even know the name of.
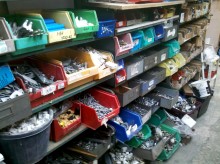 This place never fails to turn up something to help me with my projects - and while I'm digging around, looking for it, I'll very often encounter something to inspire me for future plans (for example, this morning whilst looking for my heat transfer bar, I noticed a box of beautiful copper rivets that I'm sure I can do something with...
I ended up with a piece of aluminium bar cut from a cistern flush extension - absolutely ideal for the job. I cut it just a little longer than the sides of my hexagons.
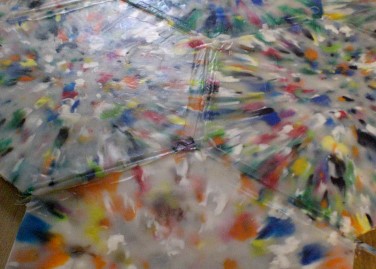 By carefully aligning the bar on top of the butt joint between two of the hexagons, on top of a PTFE sheet, then applying the clothes iron, the metal bar conducts heat only to the joint - as well as allowing me to press down the melted area to force the edges to bond.
I did this from one side, then left it to cool (pressed flat with a weight) and repeated on the other side.
The result is a strong, neat joint that doesnt introduce any distortion to the piece as a whole.
This is an exciting result, as it's fast, neat and strong. This will definitely work - which means the build can now progress at full steam.
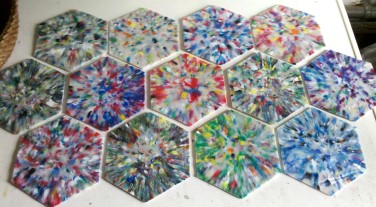 It might be a little while until the next update on this project, but not because it's gone cold.
I'm busy manufacturing a stockpile of plastic hexagons - I'll do this until my supply of processed plastic is exhausted (or until I think I have enough to build the whole boat).
This is primarily for operational efficiency. I have limited space, so it makes sense to do a large amount of one task before clearing those tools away to do a different one.
Appearance Of The Materials
You might be wondering why the plastic panels I'm making here all have a sort of splashed, radial pattern to them.
This is because it starts out as a heap of ground up plastic and spreads out under pressure when I clamp down the heated press. The main reason to do this is to compress the material down and expel any voids, but it also has the effect of smearing the plastic outwards from the centre.
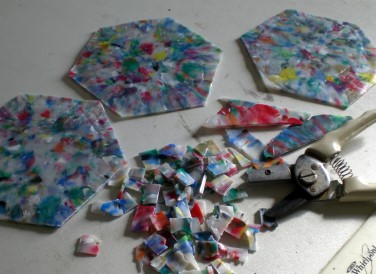 So far, nothing is going to waste - using garden secateurs, I'm snipping the trimmings from making the hexagons into small squares, then mixing them back in with subsequent batches.
Continually remelting the same plastic can end up degrading it - so in order not to compromise the integrity, I'm only using about 25% re-recycled material - the rest is made up of the usual ground-up bottles and caps. This gives the panels a different look, but variety is good.
Update - November 13, 2011. The laminated framework is coming along nicely.
A couple more sessions and it will be complete - it can't all be done at once due to limitations of space (and clamps) - also, some of the structures don't reach final strength until the glue cures - it would probably collapse under its own stresses if I tried to build too much at any one time.
Update - November 18. The frame is complete.
It'll need sanding smooth and coating with a lick of paint, then I can start cladding it with recycled plastic panels.
Update 27th October 2012 - Termination Of Project
Sadly, it's time to declare this project cancelled - it just isn't going to work. This isn't a decision I've taken lightly, but it's got to be done.
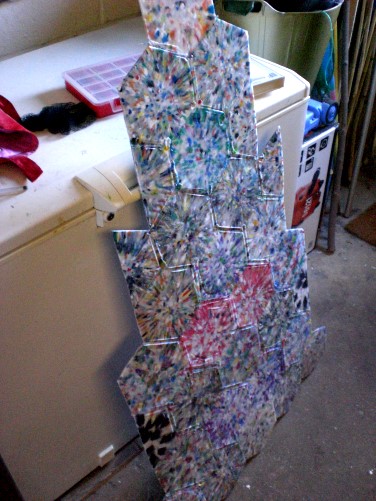 I've only managed to compose a plastic panel big enough to cover about one third of the bottom of the boat - and this turned out to be more difficult than it first seemed.
Welding together two or three of the hexagons isn't too hard, but as more are added, it becomes progressively more difficult, requiring repeated remelting of the seams to cope with small holes or inconsistencies in the joints.
Furthermore, during the months in which I have neglected the constructed panel, it has warped considerably. HDPE just isn't a well-behaved material.
I reckon the only way to do this (other than the conventional rotational moulding method) would be to press very large sheets of plastic (i.e. 8 by 4, like plywood) all at once, then cut shapes out of them - but that would require an industrial heated press,
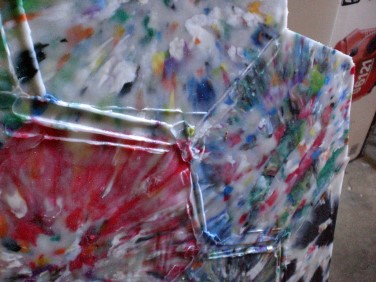 The finish quality of the welded material isn't what I would have liked, either - exerting enough force on the melted margins of the hexagons squishes some of the plastic up - and any attempt to iron this back down just makes more mess - and the quality spirals rapidly out of control.
In Conclusion
If I somehow managed to pursue this project through to its intended finality, I'd have ended up with a boat that only just works, that probably wouldn't last very long and that might possibly fail in a dangerous way at a critical moment.
I'm not prepared to invest such a huge amount of further effort and energy on a project that has such a small chance of marginal success.
Anything Salvageable?
I did consider cladding the timber boat frame with thin ply - it's a nice shape and I'm sure it would make a decent little craft, but then I reconsidered - if I was setting out to make a small flat bottomed canoe, I wouldn't start with a frame like this - I'd just stitch and tape it - so the frame isn't going to be saved.
There are a few dozen plastic hexagons left over - I'll keep these, as there's bound to be something I can make out of them, individually.
