Building A Boat - Page 6
By Mike on Thursday, July 19, 2007, 21:14 - Permalink
 More progress on building my little boat. On this page, it gets a color, and a name...
19 July 2007: A few more odds and ends today. I ran the router over the undersides of the deck planks, so now there are no sharp corners on them at all (I didn't do this earlier because I wasn't sure whether they would be glued or screwed to their supporting battens).
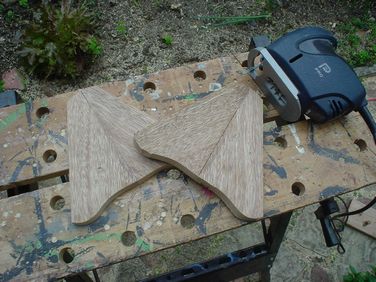 I cut out the breasthooks
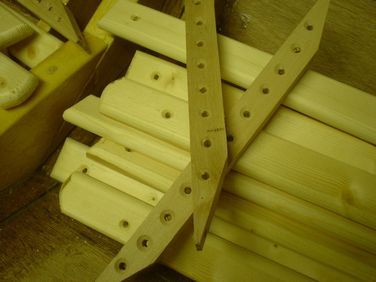 And I drilled and countersank (countersunk? Countersinked?) all of the deck planks, plus their supporting battens (which I cut from reclaimed beech)
Working With Linseed Oil (And Drying Oils In General)
Linseed oil (the finish I'll be using on the inner deck) is what's known as a 'drying oil' - this means it doesn't just soak into the timber, it cures, turning into a waxy solid that protects the wood surface.
But 'drying' is perhaps not quite the right term - because what it actually does is to oxidise - it reacts with air - this is a chemical reaction, as opposed to just an evaporative process, and it's a chemical reaction that produces heat (it's exothermic).
This can actually be dangerous - if rags are used to apply it and these are left screwed up in a ball afterwards, the fabric provides lots of surface area (and thus exposure to oxygen), but traps heat in the screwed-up ball - this heat causes the remaining oil to oxidise even faster and this effect can run away to the extent that the rag ball can spontaneously ignite.
Rags used for applying linseed oil should therefore be deliberately burned, or should be dried flat outdoors before disposal.
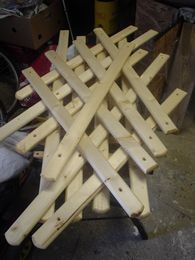 The really great thing about oiling timber is that you don't need to worry too much about keeping it from touching things, or gathering dust and nibs - because it's not a thick sticky coating, it soaks in and the items being oiled can just be stacked up.
I applied the oil to the deck timbers with a paintbrush, left it to soak in for half an hour, then wiped off the excess with a rag. It gives a honey-coloured sheen to the pine and a rich deep lustre to the beech. My family think linseed oil smells 'fishy', which is interesting, because it contains omega fatty acids, just like oily fish.
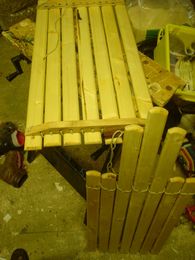 Lacing the deck boards onto their battens took a couple of attempts to work out the best tying plan, but I worked it out in the end - it's a bit like a machine stitch - a loop of cord goes down through the hole and the batten, then another piece of cord is passed through it underneath.
A little scrap of hardwood with a couple of holes in it was added to the knot for each section - this can be turned as a Spanish windlass, tightening the cord.
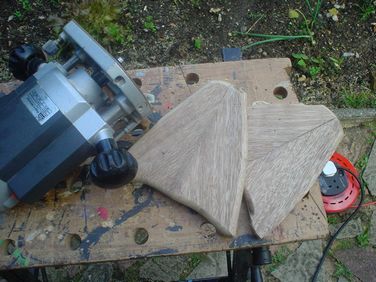 20 July 2007: Great progress today. I rounded off the edges of the breasthooks - on the top, they're rounded on all edges, on the bottom, they're not rounded at the sides where they will be in contact with the gunwale
Finishing Off The Cleats
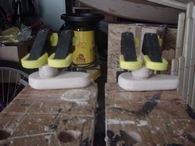 The cleats were assembled with polyurethane glue - I threaded both parts on nails to keep the holes in register, then pulled out the nails after applying the clamps (or they'd have been stuck in place by the expanding glue)
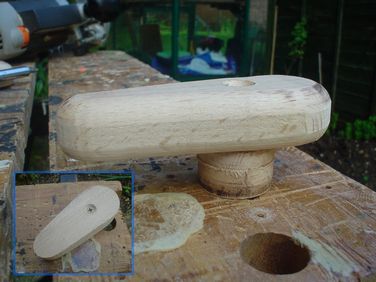 I rounded off the cleats - they're only small bits of wood though - too small to clamp down and still be able to use the router on - so I screwed them to the workbench temporarily(inset). This is what they'll look like (still rough and unfinished at the moment)
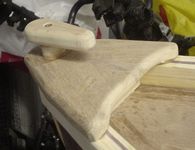 Then they were screwed into place on the breasthooks (with more glue as well - both on the timber faces and on the screw thread to lock it) - the screws are about 5 inches long and extend right down into the bow and stern posts, so the cleats should be secure enough to support the whole weight of the boat if necessary.
Router Terminology Oddness
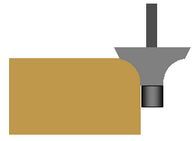 Throughout these pages, I've been talking about using a 'quadrant bit in my router - turns out I'm pretty much the only human on the planet who calls it that (I must have just made up the term, I suppose). Its proper name is a Rounding Over Cutter - it produces a - yes - rounded over edge.
When used at full depth, the profile of the curve that it produces is a quarter of a circle (a quadrant).
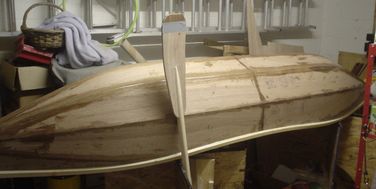 I fitted the blade on the second paddle and - it's good to get this one out of the way - I glassed the three bottom seams externally.
I had a very small amount of epoxy left at the end of the glass taping job, so I masked off the end of my paddle and slapped it on there - hopefully this should make it a bit more durable if it comes into contact with stones or other objects.
So it's been quite a satisfyingly progressive evening. The glass tape seams might need a filler coat if the weave seems too conspicuous, after that, there are only a few little bits of fitting to do, then a bit of sanding, then painting and varnishing. It is getting closer to completion now, really.
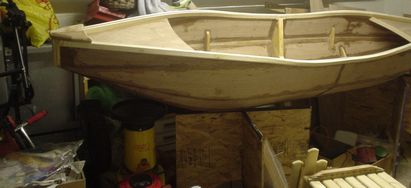 21 July 2007: I laced up the decks onto their battens (see above right) and glued on the breasthooks
Last night's glass taping set well on the bottom seams and it was sufficiently smooth that it might not need an infill coat. There's just a little bit of filling and fixing now, then the sanding and painting.
22 July 2007: Not much chance to work on it today - just sanded down the second paddle and one of the cleats, and filled a little void under one of the breasthooks.
23 July 2007: I realise this photo doesn't look all that different from many of the others, but it does in fact mark a milestone - the completion of the outer hull - all of the taped seams have been brushed over with a thin layer of epoxy loaded with colloidal silica (essentially very pure, incredibly fine sand) - this makes it harder wearing. All of the untaped seams were smoothed to a small radius and also brushed over with the same mixture, which has sealed any little bits of plywood edge that might have been exposed and has flowed into small voids and imperfections in the seam fill (there were surprisingly few blemishes to this though).
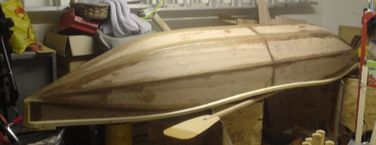 So apart from a quick de-nib, the hull is ready for priming. However, I need to sand the gunwales and breasthooks and varnish these and the inside of the boat first - my reasoning being that it will be easier to remove stray drops of paint or primer from varnished wood than plain, so the varnish must go on first.
There was again a little epoxy left over, so I applied this to the end of the smaller paddle blade.
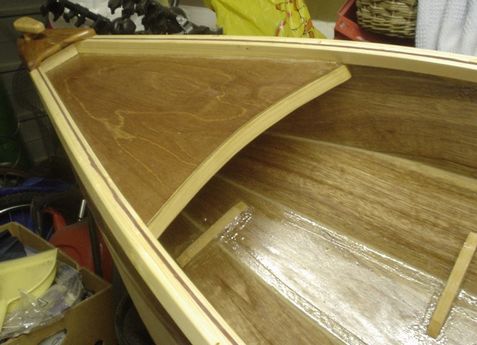 24 July 2007: The beginning of the end - or perhaps I should say: the start of the finish - I rubbed down the rough spots on the gunwale, vacuumed out all the dust carefully (twice - with a half hour interval in between - in case the first vacuuming kicked up more dust), then applied the first coat of varnish to the gunwale, breasthooks and cleats and to the entire inside of the hull - this picture just doesn't do it justice - the ply has now turned a uniformly beautiful rich red-brown colour and there is no difference between the wood that was 'wet' by the epoxy and that which is covered with varnish. It's a total transformation!
I also varnished the paddle handles and shafts - the blades will be painted to match the outside of the hull.
De-nibbing
Ever wonder how furniture makers get such a smooth glossy coat of varnish on their finished articles?
There are actually lots of reasons for this - multiple thin coats, professional quality high-solids varnishes and tack cloths, but one of the key factors is de-nibbing between coats.
Ideally, finished wood should be varnished in a completely dust-free environment, but this isn't always possible and even in near-ideal conditions, there are always a few motes drifting about. When dust and fluff settles on drying varnish, it creates a 'nib' - a little raised point - it isn't just composed of the debris itself, but also a little spike of varnish, drawn up to a point by surface tension.
A quick rub over with very fine sandpaper, followed by a wipe down, ideally with a tack cloth, before a subsequent coat means that uniformly flat coats can be built up and the result will be a much smoother final finish. It's really surprising how much of a difference a little thing like this can make.
Tack Cloths
I mentioned tack cloths above - these are lint-free cloths that are treated with something to make them sticky and are great for removing specks of dust and debris after de-nibbing, or before the first coat.
People tend to have their own recipes for making tack cloths (or I think you can probably buy them already made, but it's really just a case of getting a lint-free dusting cloth, soaking it lightly in varnish (oil based) diluted with white spirit, allowing to only partially dry, then keeping in a sealed container until needed.
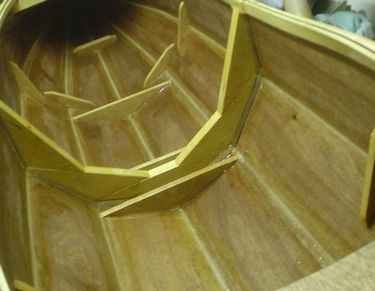 25 July 2007: I can't do anything today the varnish seems to have soaked into the plywood quite thoroughly, but it's still tacky - maybe it went on a bit thick because of the absorbency of the wood, or maybe it's just the cold damp weather that's making it take a long time to dry. I want to de-nib (see above right for definition) at least some areas before applying a second coat and this is only possible when the first coat has set hard.
26 July 2007: I've applied the second coat of varnish - this one went on much more easily than the first, but I think at least one more will be necessary to completely seal everything.
27 July 2007: I wasn't able to do anything at all today - the varnish is taking forever to dry completely - I think this might be for two reasons; firstly, the weather here has been very wet and cold for nearly the whole summer - it might be that the humidity is stopping the solvent from evaporating away (even though it's an oil-based paint).
Also, I noticed the varnish near the gunwale was drying faster than in the bottom of the boat - I'm not sure whether the solvent, when evaporated, is heavier than air, but if it is, it could be pooling in the boat - I turned it on its side and that seemed to help a bit.
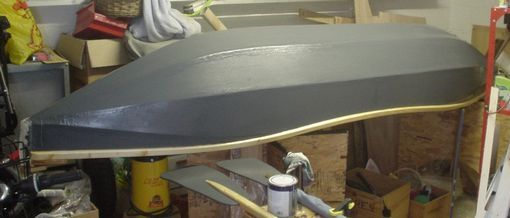 28 July 2007: The varnish is still tacky on the inside (that's 48 hours and still not dry - the tin says 6 to 8). The gunwale is dry though, so I was able to turn the boat over and apply the primer coat to the outside of the hull.
It's dark grey primer because the top coats will be a dark green colour and might look pasty if it's applied over a white primer. I also primed the paddle blades.
30 July 2007: Bit of a setback. Yikes.
The varnish just wasn't drying at all on some of the internal seams and was still wet and sticky after 5 days. The primer was still soft and tacky on the outer seams after 2 days. Something was wrong.
Turns out it's something I should have known about and circumvented. When epoxy resin cures, it forms a skin of something called amine blush - a sort of waxy/soapy substance that prevents the proper adhesion of paint/varnish, and interferes with the drying process.
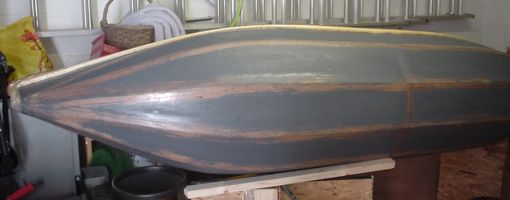 Nothing else for it but to strip the varnish and paint off the seams with a rag and white spirit:
So it looks like it's been distressed or artificially patinated now.
Looks worse than it is though - all that I need to do now is wash off the amine blush with some hot soapy water (I'll probably give the seams a bit of a wet sand with some waterproof abrasive paper while I'm at it), then wait for it to dry thoroughly and replace the primer.
Ho hum. This is the sort of lesson I'd rather have learned from somebody else's mistake - and should have - turns out amine blush isn't a secret or anything.
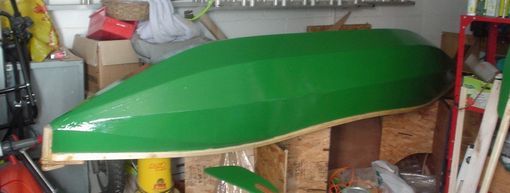 31 July 2007: Now that's more like it! - the primer I applied over the sanded and washed seams dried and adhered very well overnight, so this evening, I applied the first coat of gloss finish - this it the colour it will be when it's finished. I also put the first coat of gloss on the paddle blades to match.
01 August 2007: I applied a second coat of gloss to the hull and the paddle blades - not much point putting a picture here as it would look the same - it looks different close up - much smoother and shinier - but not in a photo.
02 August 2007: The second coat of gloss has dried nice and smooth, but I'm going to leave it a while because it still feels slightly soft and pliable - gloss paint doesn't cure rock hard straight away. I don't want to scrape the finish by turning it over until the paint has toughened up a bit.
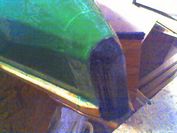 So all I did tonight was to paint the end posts - using a half tin of black Hammerite that I had lying about. It's supposed to be for painting rusty metal, but I tested it on a piece of bare ply and on another bit onto which I had brushed some epoxy during the seam glassing - it adhered amazingly well to both surfaces (even though I did nothing to prepare the epoxy for painting) and cured quickly to a very tough hard finish. It doesn't require any primer or undercoat - for my next boat (oh yes, there will be another), I'm going to use it on the whole of the outside.
Varnish problems - resolved
Turns out that amine blush isn't the only reason the varnish wasn't curing - I think the varnish might well be a bad batch, or just a terrible product - It wasn't cheap stuff though - it was Wickes (yes, name and shame) Master Exterior varnish. The reason I suspect the varnish, rather than the process, is that it also hasn't dried properly on the shafts of the paddles - I tried rubbing it with abrasive to de-nib and it just balled up into rubbery pieces - and this is more than a week after application. So, Wickes - your varnish sucks. Sorry, but it does.
Fortunately, I discovered half a tin of B & Q yacht varnish in the garage - there was a skin on the top when I opened the tin, but the varnish underneath seemed OK. I stirred it up and tested it on a small area and it just works fine - it even dries properly on the glass taped seams - even the ones that were left a bit sticky after I cleaned off the crappy Wickes varnish.
Apologies for the poor quality photo - my family have gone away for a few days, taking the camera. Any notion that they have run away to escape the paint fumes and my mad obsession with boats is just a silly rumour and you should ignore it.
04 August 2007: Very nearly finished now. I've cleaned up a lot of the sticky residual varnish and have applied a couple of test patches of varnish of a different type. I think the first lot may have been a dud batch, because the outside of the tin is still sticky - although maybe it just doesn't like drying on nonporous surfaces.
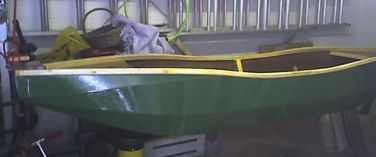 Anyway... the boat is now turned right side up and hung from ropes attached to the ceiling (so that the paint on the underside - which is still slightly soft - won't be damaged by the supports.
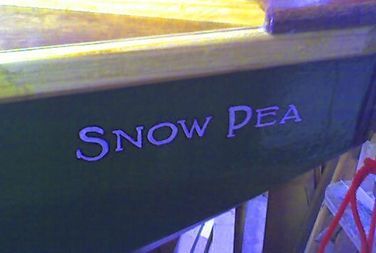 Also... I've chosen a name:
Construction is all but complete now, so I won't be reporting any more on that. The next page is... YES! - it's (going to be) The Launch and Maiden Voyage of The Snow Pea.
