Building A Boat - Page 2
By Mike on Monday, June 11, 2007, 20:19 - Permalink
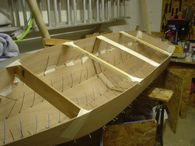 11 June 2007: Assembly - proper assembly - started today!
Here it is with the first three panels stitched together - it's a tricky job because it just wants to fold in flat upon itself. I had to weigh down the middle section and clamp or restrain the outer panels with clamps and bungee cords.
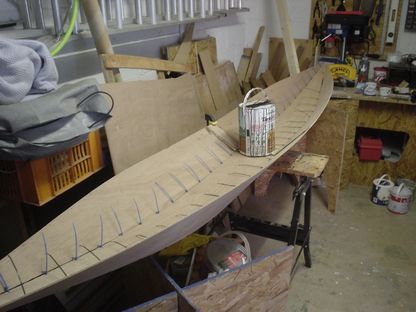
Cramped conditions?
I mentioned on the previous page that I'm having to construct this boat in a small space, well - here it is:
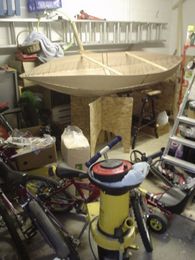
As you can see - there's just enough space for the boat, and for me to stand next to it, and very little else.
Progress happened quite quickly - more panels just seemed to add themselves:
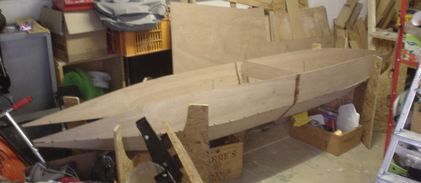
I flipped the sawhorses over to work on the last few panels (above) - the boat nestles really well into the curved cutouts.
Revised assembly plan
I've changed my mind about the precise order and procedure of assembly. here's the plan now (given that we're now past all the stitching):
- Insert spacers and tighten stitches
- Masking tape patches on inner seams
- Spot glue outside seams (the tape in the previous step is to stop it blobbing through the crack)
- Remove tape
- Remove stitches
- Masking tape outer seams
- Fill and radius inner seams
- Glass tape and epoxy inner seams
- ...
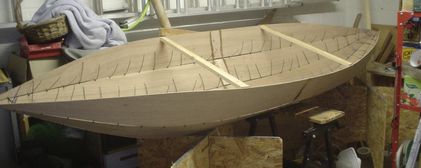
And here it is with all the panels stitched in place - I added a couple of temporary braces to stop it folding in on itself.
Setting the joints
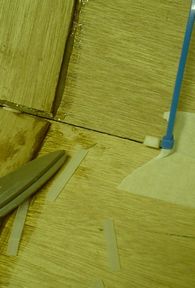 It's important that the joints are left slightly open, to enable the adhesive to work in between adjoining panels - areas where timber presses hard against timber may turn out to be weak spots.
So I cut some cable ties into pieces and inserted them between the panels as I tightened up the stitches.
I also put masking tape in alternate gaps between stitches - this is so that when I spot glue the seams from the other side, the glue doesn't seep through and make a mess.
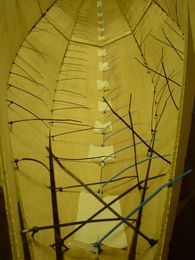 Then the hull was flipped over ready for the spot gluing (it looks crooked here, but that's just the camera angle)
Brace, Brace
 The spring of the plywood panels was making them misbehave, especially the top ones - I've inserted some extra temporary braces to keep everything in proper alignment.
These will remain in place at least until I have added a couple of structural timbers - which will consist of a rib-like reinforcement at the centre and one toward each end where the curvature begins
After preparing the middle seam, I turned the hull over, made sure it was lined up nice and straight, then I spot glued the seam in the places where I'd taped on the inside/p>
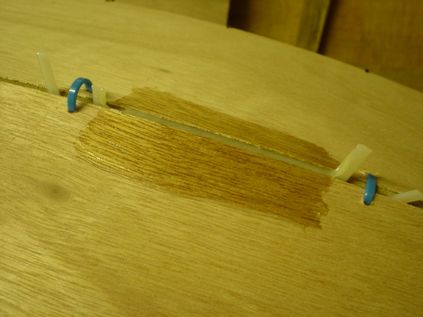
I'm going to leave that central seam a good long time to fully cure - these glue joints will contribute part of the integrity of the finished hull, so I don't want to risk weakening them by flexing them prematurely.
12 June 2007: The tacking on the first seam has set nicely and there is already a marked increase in rigidity. I removed the masking tape and the inside glue lines are really nice and neat.
I also tightened, spaced, taped and tack-glued the next two seams (working outwards from the centreline) tonight - this went well and for the first time, I had almost no glue left over - I must be getting a bit better at judging the amount.
I also got myself a buoyancy aid today, but I won't be adding that into the project costing, as it's going to be my birthday present from a couple of family members.
13 June 2007: I tacked the last two seams today - this was really tricky, because as you've seen from other photos, my workshop is tiny - and I can't work on both sides of the boat at once (this will have to change as completion draws nearer...) - so I had to glue up one seam, then carefully roll the boat over and do the other one.
It's not as bad as it sounds though - consider that the amount of plywood in use here is about equivalent to a single sheet - so the hull *could* actually be lifted with a single hand, if a suitable handhold existed.
I was able to pick it up by the bracing timbers and turn it over without actually rolling it on anything - I carefully checked alignment of the timbers after turning and all is well.
Here's what it looks like now:
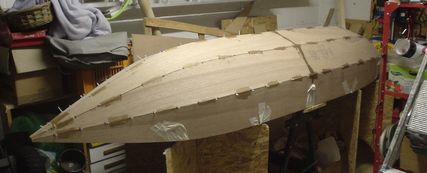
You may have noticed a slight difference between the hull now and the card prototypes - the stiffness of the ply has meant the gunwale dips down at both ends. This might have been a problem if I had not already planned to add those wedge-shaped extra panels - which will bring it back to level (but won't turn up the ends, as I originally anticipated).
15 June 2007: After much careful consideration over possible ways to construct the strengthening ribs, I settled on this: I cut some wedge-shaped pieces out of CLS framing timber, then screwed them together to make the polygonal shape (left picture shows them just stacked loose inside the hull - assembled into the rib on the right).
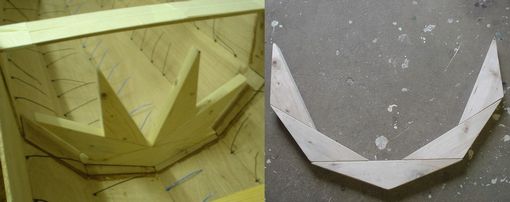
They're only assembled dry at the moment - when I've built some of the other structural members, I'll glue them all up in a batch (to minimise wasted glue) and fit them. The screws holding this together are the first metal components in this build and I might not even leave them in once the glue has set.
For my next trick...
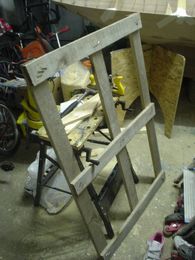 Watch me transform this beautiful oak timber...
...what? It's just an old pallet? Not for long - the place I work receives palletised good from all over the world - most often these pallets are just very poor quality softwood, but a few come in made of nice hardwoods - either beech or oak (as in this case), or more often Asian or South American hardwoods of various kinds. Shame to let it go to waste.
18 June 2007: I'm using reclaimed timber for many of the smaller structural members. I'm doing this for a couple of reasons; firstly, I'm a cheapskate and it's a great way of getting small lengths of decent timber for free, but secondly, it's a hassle to buy decent hardwoods - the DIY stores just don't stock any and although I'm no longer afraid of the timber merchants, it's too far to the nearest good one.
So, we start off with a very unpromising-looking pallet (see right). The first thing to do is to prise up the nails - in this case it was quite easy because they had just been driven through oversize and bent over - so I could just straighten them out and hammer them back through - but sometimes I have to drive the bolster into the joint and hammer it through to break or cut the nails, then pull them out with pliers or anything else that works
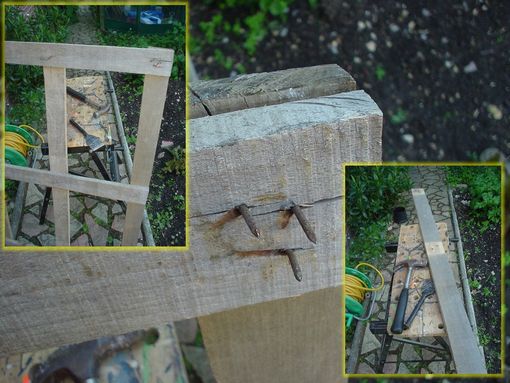
A careful inspection of the timber is necessary before planing smooth - just to make sure there are no embedded nasties like bits of gravel or parts of nails, then a couple of passes with the electric planer makes it all look lovely
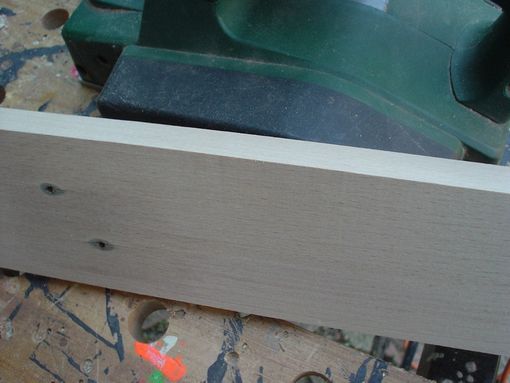
 Turns out the timber was beech, not oak - it was the black staining around the nails that made me think otherwise, but this isn't a problem - in fact beech is probably better for these components as it's very strong.
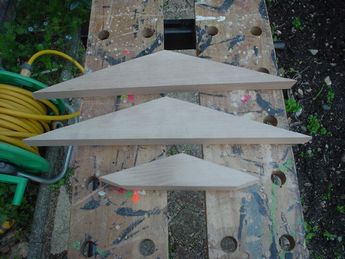
So you only get about 18 inch lengths of usable timber, after losing the nails and any splits, but that's more than enough to cut out a few mini-ribs
The bigger ones will go into the bottom of the boat where they will also serve to support the inner deck (which is to be duck boards).
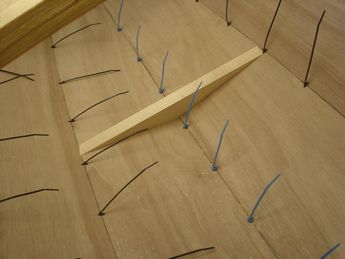 The smaller ones -quite a few of them - will be distributed all over the boat. they won't form complete ribs, like the big central one, but they won't need to - each mini-rib holds one panel rigid relative to the next, so careful placement should provide most of the rigidity of complete ribs, without most of the bulk.
19 June 2007: Rain stopped play most of this evening, so I was only able to cut out a couple more mini ribs. I need to get cracking on the rest so I can get back to construction
20 June 2007: Oh, there's always an excuse! Picnic supper today and not much time to work on the boat, but still managed to cut out two more mini-ribs and two midi ribs. Just need a few more (tomorrow) and I can start gluing.
I also ordered the paint today - a huge tin of army surplus marine paint on ebay - deep bronze green. This project is getting a bit more expensive than I thought.
21 June 2007: Assembled and glued in place the main rib, plus some of the smaller ones today
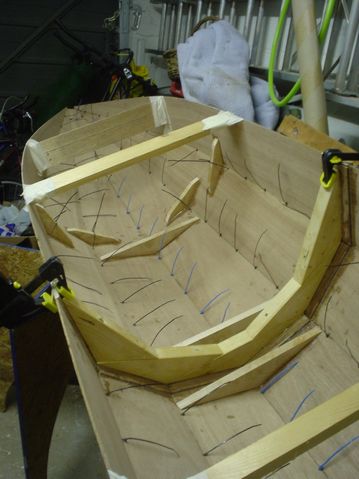 They don't look much, but they should be quite good at stiffening the structure. Lots more strength will be added by the epoxy and glass tape, of course.
Stitched up
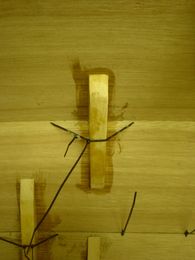 I re-used the stitch holes to keep the mini-ribs in place
There are thin cable ties and there are long cable ties, but there are no long, thin cable ties - so it was necessary to join several cable ties together to get this working.
Filling
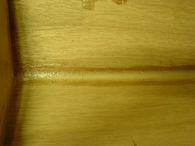 Before the glass tape can be glued in place over the seams, it is necessary to fill them and form a smooth inner radius curve from one panel into the next - this will make it easier to get a really close, even fit with the glass tape.
The pre-thickened epoxy glue I have been using is a little bit too runny for this, so I needed to add a powder thickener to make it stiffer and less saggy. There are powders available for sale for just this purpose - glass microballoons, cellulose micro-fibres, wood flours, etc.
I took a leaf out of Hannu's book and used ordinary wheat flour - this idea shocked me when I first came across it on his web page, but on thinking it through, I'm sure it won't be a problem - the flour is so thoroughly mixed with the glue that all of the particles are essentially encsapsulated in plastic - add to this the extra layers of epoxy, primer and paint that will be over the top of the filler and really, there's nothing to worry about at all.
Mixing the epoxy
The mixture ratio for the epoxy is quite critical - with pre-thickened epoxy glue, it's often 1:1 ratio, but with the liquid used for glassing, it's usually a smaller amount of hardener to a larger amount of resin - in the case of the stuff i'm using 1:5.
You can buy ready-marked graduated cups for mixing, but I just used a clear plastic disposable cup. to save the hassle of marking more than one, I did it like this:
- Put two cups together tightly, one inside the other
- Add a small amount of water to a third cup and mark the level
- Tip the water into the inner cup of the first two, and mark the level on the outer one
- Fill the third cup to the marked level and tip it into the inner cup - do this five times, mark the level on the outer cup again.
- Throw away the water and dry the inner cup.
- Now you can pour hardener and resin into the inner cup, then remove it from the marked cup, mix and use - when you want to mix another batch, just use a new inner cup and keep the outer (marked) one clean and tidy for repeated use.
It was all a bit messy, tonight's gluing job - I think I might have a bit of sanding to do when it cures, as it became very difficult to keep the glue from spreading around.
I intend to varnish the interior of the boat, so hopefully the bits where the clear epoxy has darkened/wet the wood, will just blend in.
22 June 2007: Today I removed all the cable tie stitches, upturned the hull and applied a long strip of masking tape along the outside of all of the seams - then I turned it over again and began filletting the inside seams and forming a radius on them. A lengthy, messy, fiddly job, but the inside of the hull is now ready to receive the brushed epoxy and glass tape, just as soon as the filletting mix cures.
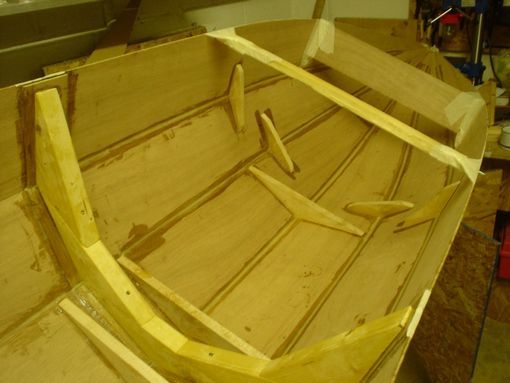 23 June 2007: I started glassing the seams today. The glass tape I've got is quite an open weave, so it was hard to cut and place it without distorting it. I cut enough for six seams - important to cut it out before mixing the epoxy, as things get messy and frantic later on.
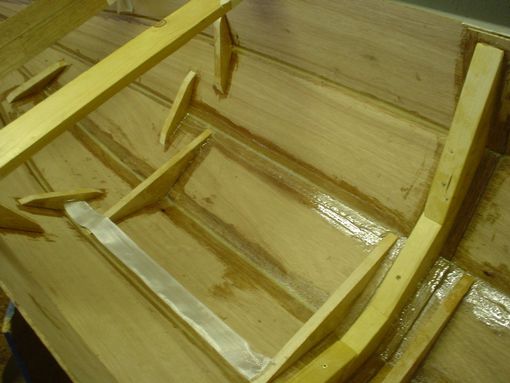 I mixed about a cupful of epoxy, brushed it onto the seams with a cheap brush - I cut the bristles to half their original length first - then laid the glass tape length on top of the epoxy, brushed and stippled a bit more epoxy over the top until it went transparent in appearance.
You can buy metal tools to press down the seams, but I just used a six inch nail bent in a right-angle. When the seams are done, they look like this:
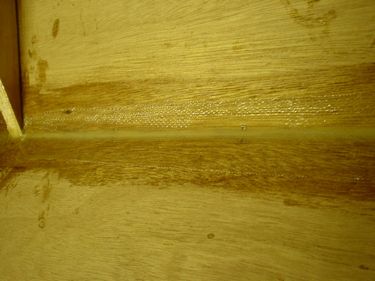 I think any more than six short lengths would have been too much for one session - even with the slow-setting epoxy I bought, it was starting to get difficult to wet the tape on the last piece.
Gunwales
I've decided to make the gunwales out of spruce - I was going to use ash, but it's too expensive for the length and amounts I need
I'm going to cut thinnish laminates from 38mm thick planed spruce - usually this timber is a bit knotty, but if you sift carefully through a big stack of it at the DIY store, it's often possible to pick out a few nice straight-grained pieces with hardly any knots or blemishes.
The laminates will be reassembled directly onto the boat - internal bracing and lots of clamps will be necessary to ensure it doesn't get pulled out of shape.
The Gloves! Never attempt anything without the gloves!
Epoxy resin is quite nasty stuff to work with - with the amounts were using here, there's just no hope of keeping it nicely confined to the ends of spreaders and stirrers, and on the joining faces of timber - so the gloves are mandatory - a box of latex examination gloves from the pound shop should hopefully see me through the entire project, but I get through several pairs per session - if you have to glue something then clamp or screw it, it's either waste a pair of glue-coated gloves, or get glue all over the tool.
They'd be impossible to put back on again once taken off dirty, so it's a good job they're not expensive.
Clamps
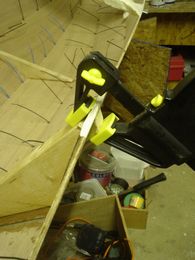 You really can't ever have too many clamps. Again, Poundland came in very handy here - whenever I see these in stock there, I grab a fiver's worth.
Notice here the addition of a small offcut wedge (on the right side of the plywood) to facilitate proper clamping of an odd-shaped angle
24 June 2007: I made good progress on the rest of the glass taping tonight - nearly all done now - see the next page for details...
