Building A Boat - Page 1
By Mike on Friday, June 8, 2007, 21:26 - Permalink
 Winter/Spring 2007 - I've been exploring the coastline a bit recently, especially around the mouth of the river Hamble in Southampton Water (UK) - and It suddenly struck me that this same river, several miles upstream, runs almost right past my door...
So... why not build a boat? Plop it in the water and sail/row/paddle it all the way down to the mouth of the river, then back up again, I guess.
Sounds almost too easy. That'll probably be because, not having done anything quite like this before, I haven't really much idea what I'm talking about, but it's going to be fun learning.
The River Hamble
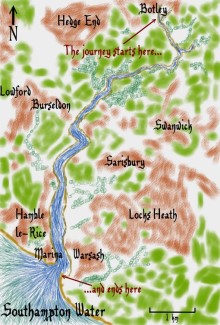 I plan to start at Botley Quay (a little way downriver from the mill) and travel all the way down to Warsash, where there is a long gravel spit at the end of the beach.
This spit slopes down nicely into the water in places, so it will be possible to get ashore without traversing any mud flats, even at low tide.
Propulsion
Too early to decide for sure, but it will either be a single or double kayak paddle, which I will also construct from scratch.
Safety
It could all go horribly wrong, so safety has to be a significant concern here. I'm a competent swimmer (let's hope it never comes to that!), but will be equipped with a lifejacket for extra safety.
So what kind of a boat?
Well, the river up near Botley village, where I live, is navigable by small boats, but it's probably a bit too twisty and narrow in places for a rear-facing rowing boat, especially attempting to go upstream, and anyway, I want to be facing forwards, so it needs to be some kind of canoe/kayak, or something along those lines.
Initial searches took me quite quickly to the very interesting website of a guy called Hannu Vartiala - who is very clearly an experienced and accomplished builder of small boats.
'One Sheet Boats'?
I'm intrigued by the idea that a usable boat can be made from a single 8x4 sheet of plywood - I really like the simple construction of Hannu's Prism Boat - to which he has fitted oars, but I think could alternatively be used with a double kayak paddle.
But I'm just a tiny bit concerned about the low, flat ends of the Prism Boat, and anyway, I want to build something at least slightly original - in at the deep end (pun intended) of boat design, although it still needs to be kept very simple.
My boat design
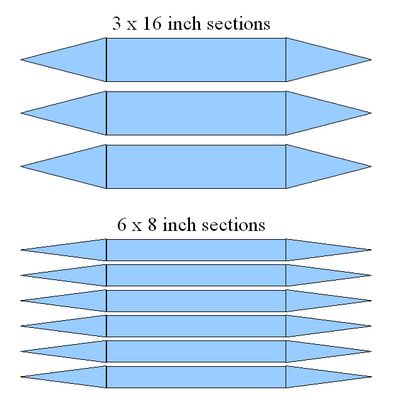
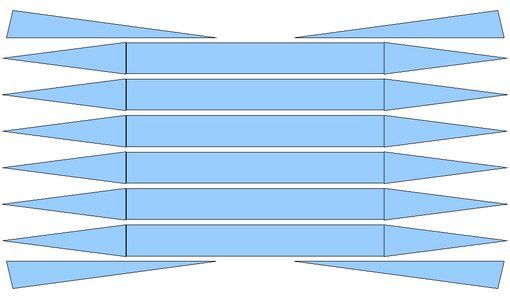
I took the basic idea of from the Prism - joining identical strips of ply together to make a basic boat shape, but instead of three planks, each 16 inches wide, I've gone for six planks, each 8 inches wide:
-This changes the shape of the boat quite significantly - it turns from a flat-bottomed, flare-sided shape (which I understand is called a 'dory') into a rounded bottom, with sides that are more or less vertical at their top edge. This might not be entirely an improvement in terms of stability, but let's run with it and see what happens.
Changing the construction in this way didn't have any effect on the flat ends - so I have also added a couple of sections - this is mostly to stop the thing getting swamped by small waves (which might not be as big a risk as I fear), but also for aesthetics - I think my design looks nice - as I hope the pictures further down will demonstrate. Anyway, I end up with an exploded view that looks a bit like this:
Experiments
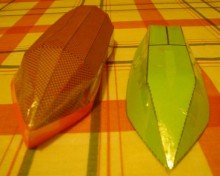
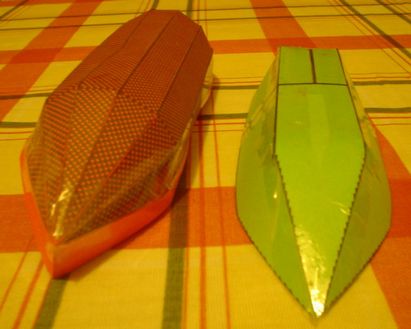
I built a couple of twelfth scale card models; the green one is the original prism design, the red one is my design:
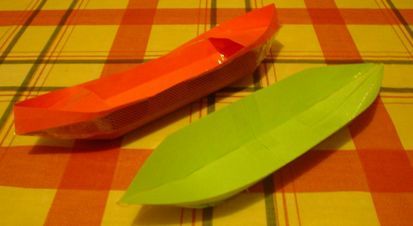
I've also added small decks at either end - mostly for structural rigidity - I think I'll actually end up with what amounts to a fat canoe.
Construction Method
I'll be making my boat using the 'stitch and tape' method - this consists of 'stitching' the panels together with wire or cable ties, then gluing them with epoxy resin and reinforcing the joint with glass fibre tape and more epoxy.
The design from which I took inspiration was intended to be cut from a single sheet of plywood; the modifications I've made mean I'll need more than one sheet, but that's OK.
A quick comparison of the hull cross sections looks like I'll not have sacrificed a significant amount of enclosed volume:
Procedure
Seems there's not only one way to construct a stitch and glue boat and not surprisingly, everyone seems to think their favourite method is the best.
I think the most sensible way to assemble is probably something like this:
- Drill and stitch panels
- Tape inside seams with masking tape
- Glue/fill seams from outside
- Remove stitches, fill holes
- Remove masking tape
- Fill/fillet inside seams
- Tape and glue inside seams
- Final gap fill from outside
- Add decks/other timbers
- Sand outside
- Paint/varnish
Starting the build
21 May 2007: I have nearly all of the materials now and I've cut out a template so that I can mark my ply to get all of the sections the same shape. I need to make a couple of sawhorses to work on, and my garage/workshop seems to have filled up with family junk again. I need to clear that out before I can start cutting.
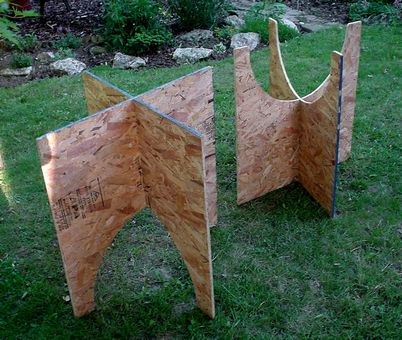
22 May 2007: I made myself a couple of sawhorses(below) out of OSB that I had lying around - to make it easier to support the big ply sheets for cutting - they're the same height as my folding workbench and when inverted, they'll be able to support the hull of the boat so I can work on the inside without it rolling about
I've also made an MDF template for marking out all of the segments to the same size and shape.
23 May 2007: Marked up the boards today and cut them out...
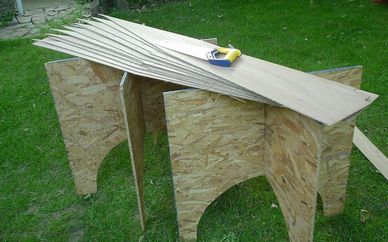 They still need trimming up a bit and the shoulders need rounding off, then I need to drill them for stitching and the build can begin!
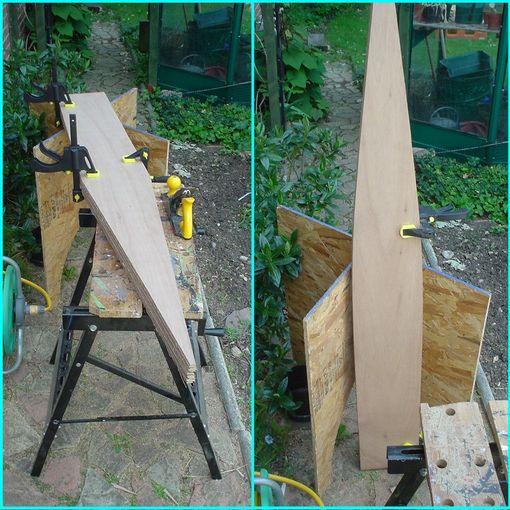 03 June 2007: Trimmed up the panels today - I was pleasantly surprised at how little difference there was between them - I had been expecting some of them to have cut out a bit wonky, but they were all the same to within a millimetre or so.
Then I clamped them together and rounded off the shoulders with my electric planer (I started with the hand plane, but it was too hard) - not the ideal tool for working with plywood, but the blades are new and sharp and I set the cut depth very shallow and it was fine.
All cut up
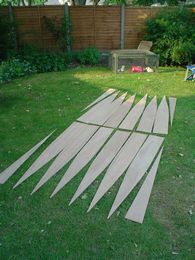
I laid all the panels out on the ground - although they are all the same, there's a slight possibility of them being slightly asymmetric, so I carefully opened them out from the centre like unfolding a map - that way, any asymmetries are mirrored front to back and side to side, which should eliminate at least one potential cause of distortion in the assembled boat.
While they were all laid out, I marked up the adjoining corners with letters in pencil, so that I can put it together in the same way later.
So I now have the twelve sections trimmed and ready for assembly - the next few jobs are:
- Cut and trim the four wedge-shaped extra panels
- Drill the stitching holes
- Glue (butt join) the sections together in pairs to make boat-length panels.
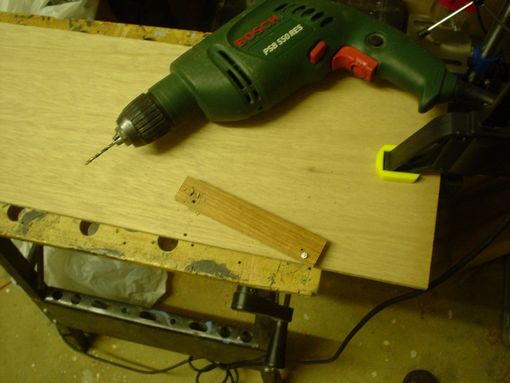 08 June 2007: I've cut out the extra panels today
Time to drill the stitching holes, so I made myself a little wooden jig to ensure they would be evenly-spaced
It's just a piece of wood with two holes in it, about four and a half inches apart and the same distance in from the edge - one hole has a masonry nail pushed through it, so the first hole is drilled with the nail hard up against the end of the section, then the nail is dropped into the freshly-drilled hole and the jig can be brought alongside the edge again to drill the next hole and so on, at precise intervals.
Both pieces to be joined (marked with the same letter) are clamped face to face and drilled at once, so the stitches should line up precisely in adjoining sections.
Drilling the stitching holes for the four extra panels was interesting, because the curvature of the two pieces is not identical - so I had to get the ends aligned, drill the first hole, then use the nail in the jig to keep everything in register while I rotated the pieces so that they were both flush-edged with the jig, ready for the next hole.
Just need to assemble and glue the butt joints, then it will very quickly start to look like an actual boat...
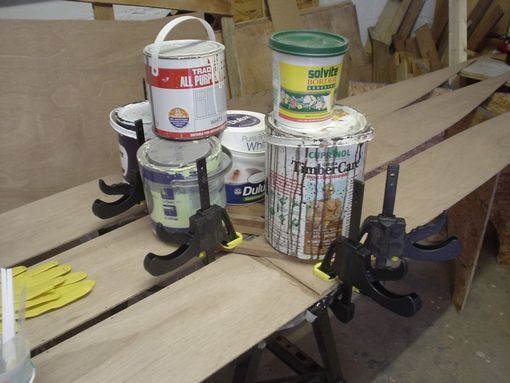 09 June 2007: I glued three pairs of sections end to end and secured the joints with ply reinforcement. I used nearly all my clamps, plus an assortment of paint pots to keep it all pressed down until the epoxy cures.
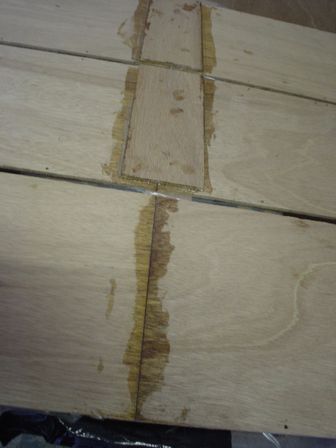 10 June 2007: The glue has cured and the joints look pretty good
The epoxy on the outside - where it was pressed against the polythene - has formed a perfectly flat smooth joint which will hardly require any sanding. The darker colour of the glued timbers indicates that the epoxy has 'wet' the wood fibres well - this means it's soaked in and the bond should be all the stronger, as it comprises the glue and to wood together.
I've glued up the last three pairs of panels today and because the weather has been exceptionally warm, the epoxy cured in a couple of hours.
D'oh!
It only dawned on me today (May 23) what I've done... obvious really, but in my decision to construct the boat out of six times eight inch segments instead of three times sixteen inch segments, I've increased the number of long stitch/tape joints required from two up to five. I think it will be worth it, but I have to admit, I hadn't thought that bit through properly at all.
What about the paddle?
I'm still not sure whether I want a single or double paddle - I'm toying with the idea of making two identical single paddles that can be fixed together somehow to make a double one.
I think the length of a single paddle is typically more than half the length of a double one, so there would either have to be some kind of overlap, or the paddles would have to have detachable handles so that the shafts can be joined.
Maybe I'm overthinking it though - perhaps I ought to just make one of each type.
Preparation for gluing
I prepared my working area by laying out the sawhorses with my work bench in between - I covered the gluing area with thick polythene - because epoxy glue won't stick to it
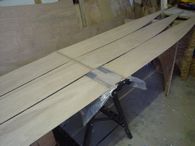 I laid out three pairs of sections end to end and mixed up a tablespoonful of epoxy - I'm using a pre-thickened marine epoxy formula for these joints
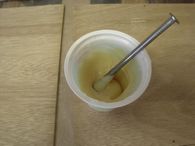 I'm using empty yoghurt pots to mix the glue, disposable plastic spoons and strips cut from ice cream carton lids to spread it around - there's no point in trying to clean up implements after epoxy - it's better to use cheap ones and throw them away.
Thinking ahead
I don't have any facilities for steam-bending of timber, so I think the gunwale and inwale are going to have to be made up from thin strips, laminated straight onto the boat. Getting them lined up will be crucial here as they won't be easy to trim after fixing.
That part of the boat shouldn't be subject to immersion very much, so I think I'm going to use Gorilla Glue (polyurethane) for it. It's supposed to be completely waterproof anyway, and should be plenty strong enough.
Working in a confined space
I don't have the luxury of a large workshop space - you'll see from the photos above that I have to cut and work large pieces of timber outside. Indoors, there's just about enough room to work on the assembled boat, but it's tight.
I have to move some of the other stuff - bikes, scooters and a go-kart, out of the garage in order to be able to get to my workspace.
Photos on the next page will show you just how cramped a space I'm talking about...
Zero Budget?
For a little while, I toyed with the idea of trying to build the boat on absolutely zero budget - thinking I could either scrounge or reclaim the materials, but this turned out not to be very realistic - for one thing, epoxy resin is pretty expensive, so nobody is going to be giving that away, but also, there's no way to reliably judge the type, quality and provenance of things like reclaimed plywood. The last thing I want to happen is for it to start falling apart when the only dry land is the other side of 100 yards of stinky black tidal mud flat.
Materials and costs
Bought so far:
- Epoxy glue: £17.01
- Epoxy Resin £21.29
- Gorilla Glue: £9.99
- Cable ties: £0.50
- 4mm marine ply £32.43
- Glass tape £9.99
- Masking tape £1.23
- Disposable gloves £2.00
- Disposable boiler suit £1.00
- 38mm spruce £12
- Primer/Undercoat £7.99
- Paint £8.49
- Varnish £9.49
- Brushes £3.00
- Buoyancy jacket (not included in costing as it was a present)
Total cost to date: £136.41
Next job: begin stitching.
Now it gets exciting - read on for more details...
